Track app data in Google Analytics with Google Tag Manager (GTM)
Learn how to segment app users in your Google Analytics account
You can track your app users via Google Analytics and Google Tag manager.
In order to do this, you will need to create a custom dimension in Google Analytics, a variable to detect the "canvas" string in the user agent, and a tag to track app users.
Even though this sounds simple enough, there are quite a few things you need to do on both platforms to achieve the desired result.
If you have a popular website, with many users, we’d recommend asking a developer to help you with this, to avoid issues with your Analytics metrics.
Before we start, keep in mind that MobiLoud relies on your website for all the content, when a page of your website is displayed in the app, we are simply performing an HTTPS request to it. For that reason, we are going to use the same Google Analytics Property that you use for your website, and it should look like this:
.avif)
Let’s get started!
On the left sidebar, open the "Admin" area by clicking the "Gear" icon on the very bottom:
.avif)
Now select “Custom Definitions” under the "Property" column:
.avif)
Click the “Create custom dimensions” button on the right side of the screen:
.avif)
A form will appear on the right side of your screen, and you must fill the fields as follows:
It is important to use the values above, for consistency and to make it easy for our team to help you with troubleshooting. Your form should look like this:
.avif)
Before leaving your Google Analytics Dashboard, go to “Admin” on the left sidebar:
Select “Data Streams”:
.avif)
Select your website’s data stream:
.avif)
Click the “Copy” button on your Measurement ID, and save the number somewhere on your computer, you will need it later:
.avif)
Let’s move to Google Tag Manager now.
Log in to your Google Tag Manager account, using this link: https://tagmanager.google.com/#/home
Make sure to select the correct website:
.avif)
You are now in the “Tag Manager” area, click the “Variables” link on the left sidebar:
.avif)
Scroll a bit to the bottom, and click the "New" button on the right side:
.avif)
Name the variable "MobiLoud - Mobile App Tracking" and click on the large block that will appear to start configuring your Variable:
.avif)
Now pick “Custom Javascript” as the variable type:
.avif)
You will then be requested to provide a piece of Javascript code, as follows:
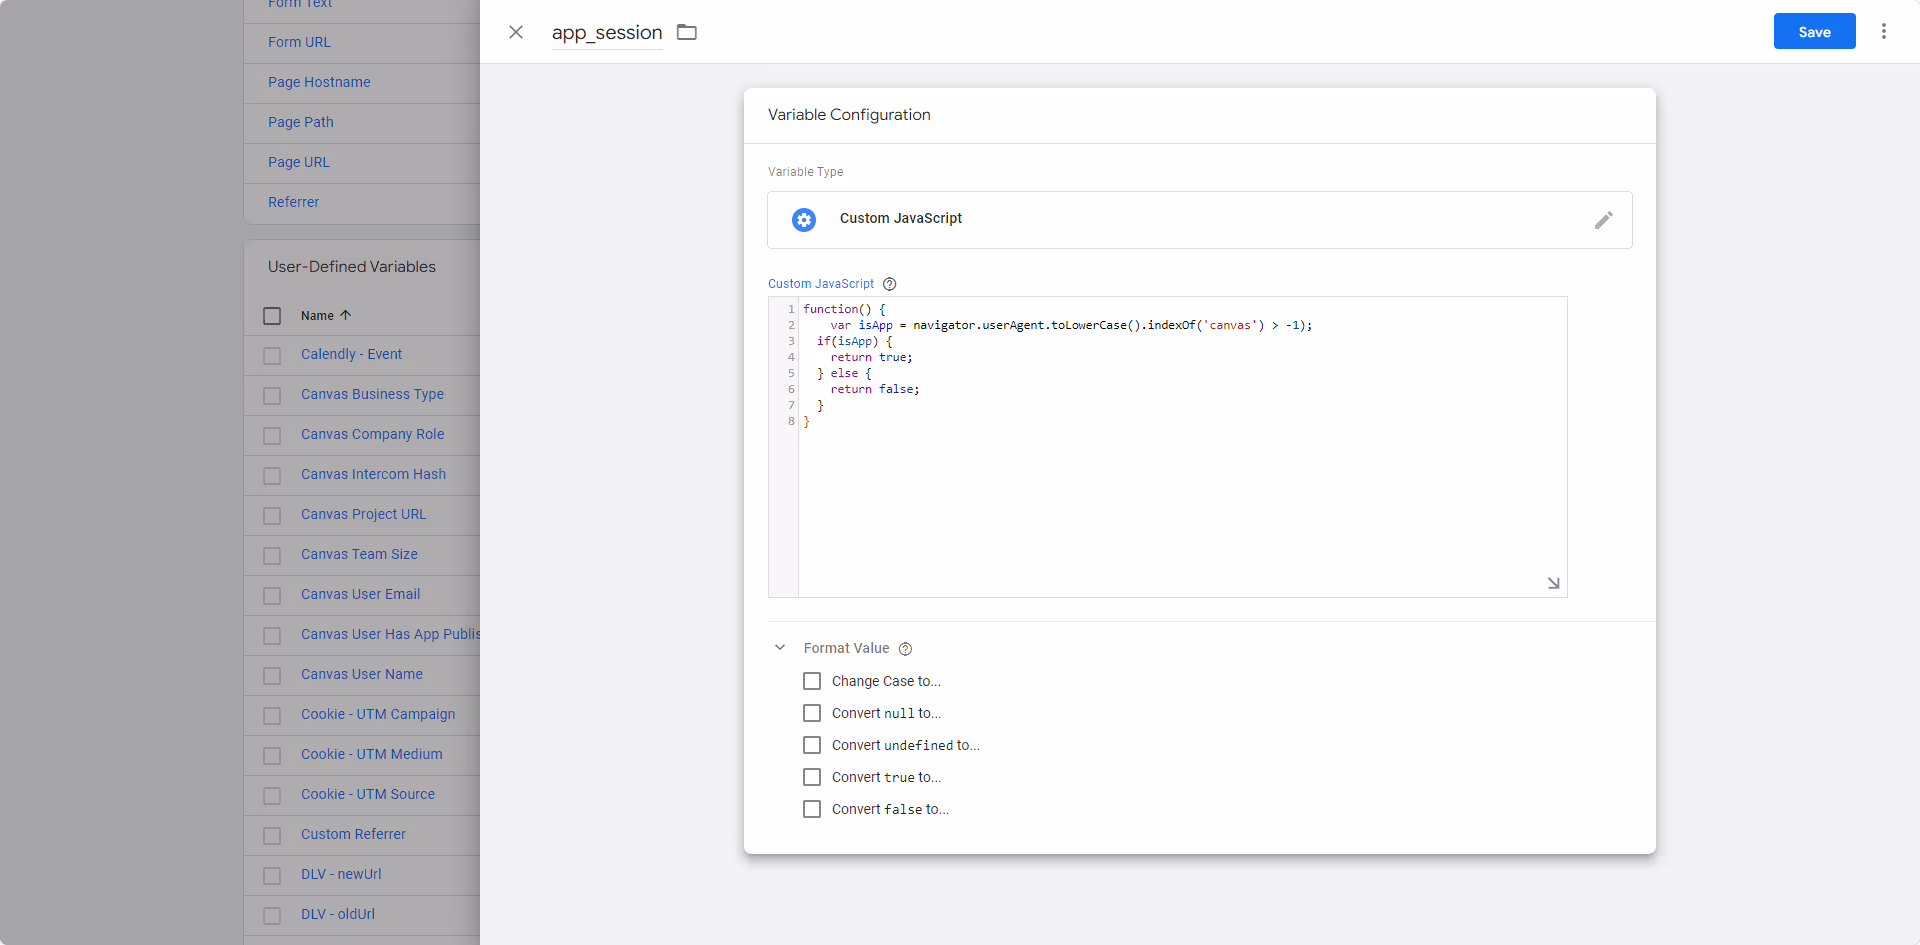
Here is the code so you can easily copy and paste it:
function() {
	var isApp = navigator.userAgent.toLowerCase().indexOf('canvas') > -1;
  if(isApp) {
  	return true;
  } else {
  	return false;
  }
}
Make sure to save your variable:
.avif)
Note: Please ignore the variable name in the screenshot. Use "MobiLoud - Mobile App Tracking" for consistency and easy troubleshooting for our team.
With your variable created, it is time to create your tag.
For this guide we consider that you have already configured your Google Analytics account into GTM, this is a requirement in order for the next steps described in this guide to work correclty.
To get started click “Tags” on the left sidebar:
.avif)
Click the “New” button on the right side:
.avif)
Name your tag the following: "MobiLoud - Mobile App Tracking Tag" then click the “Tag configuration” block:
.avif)
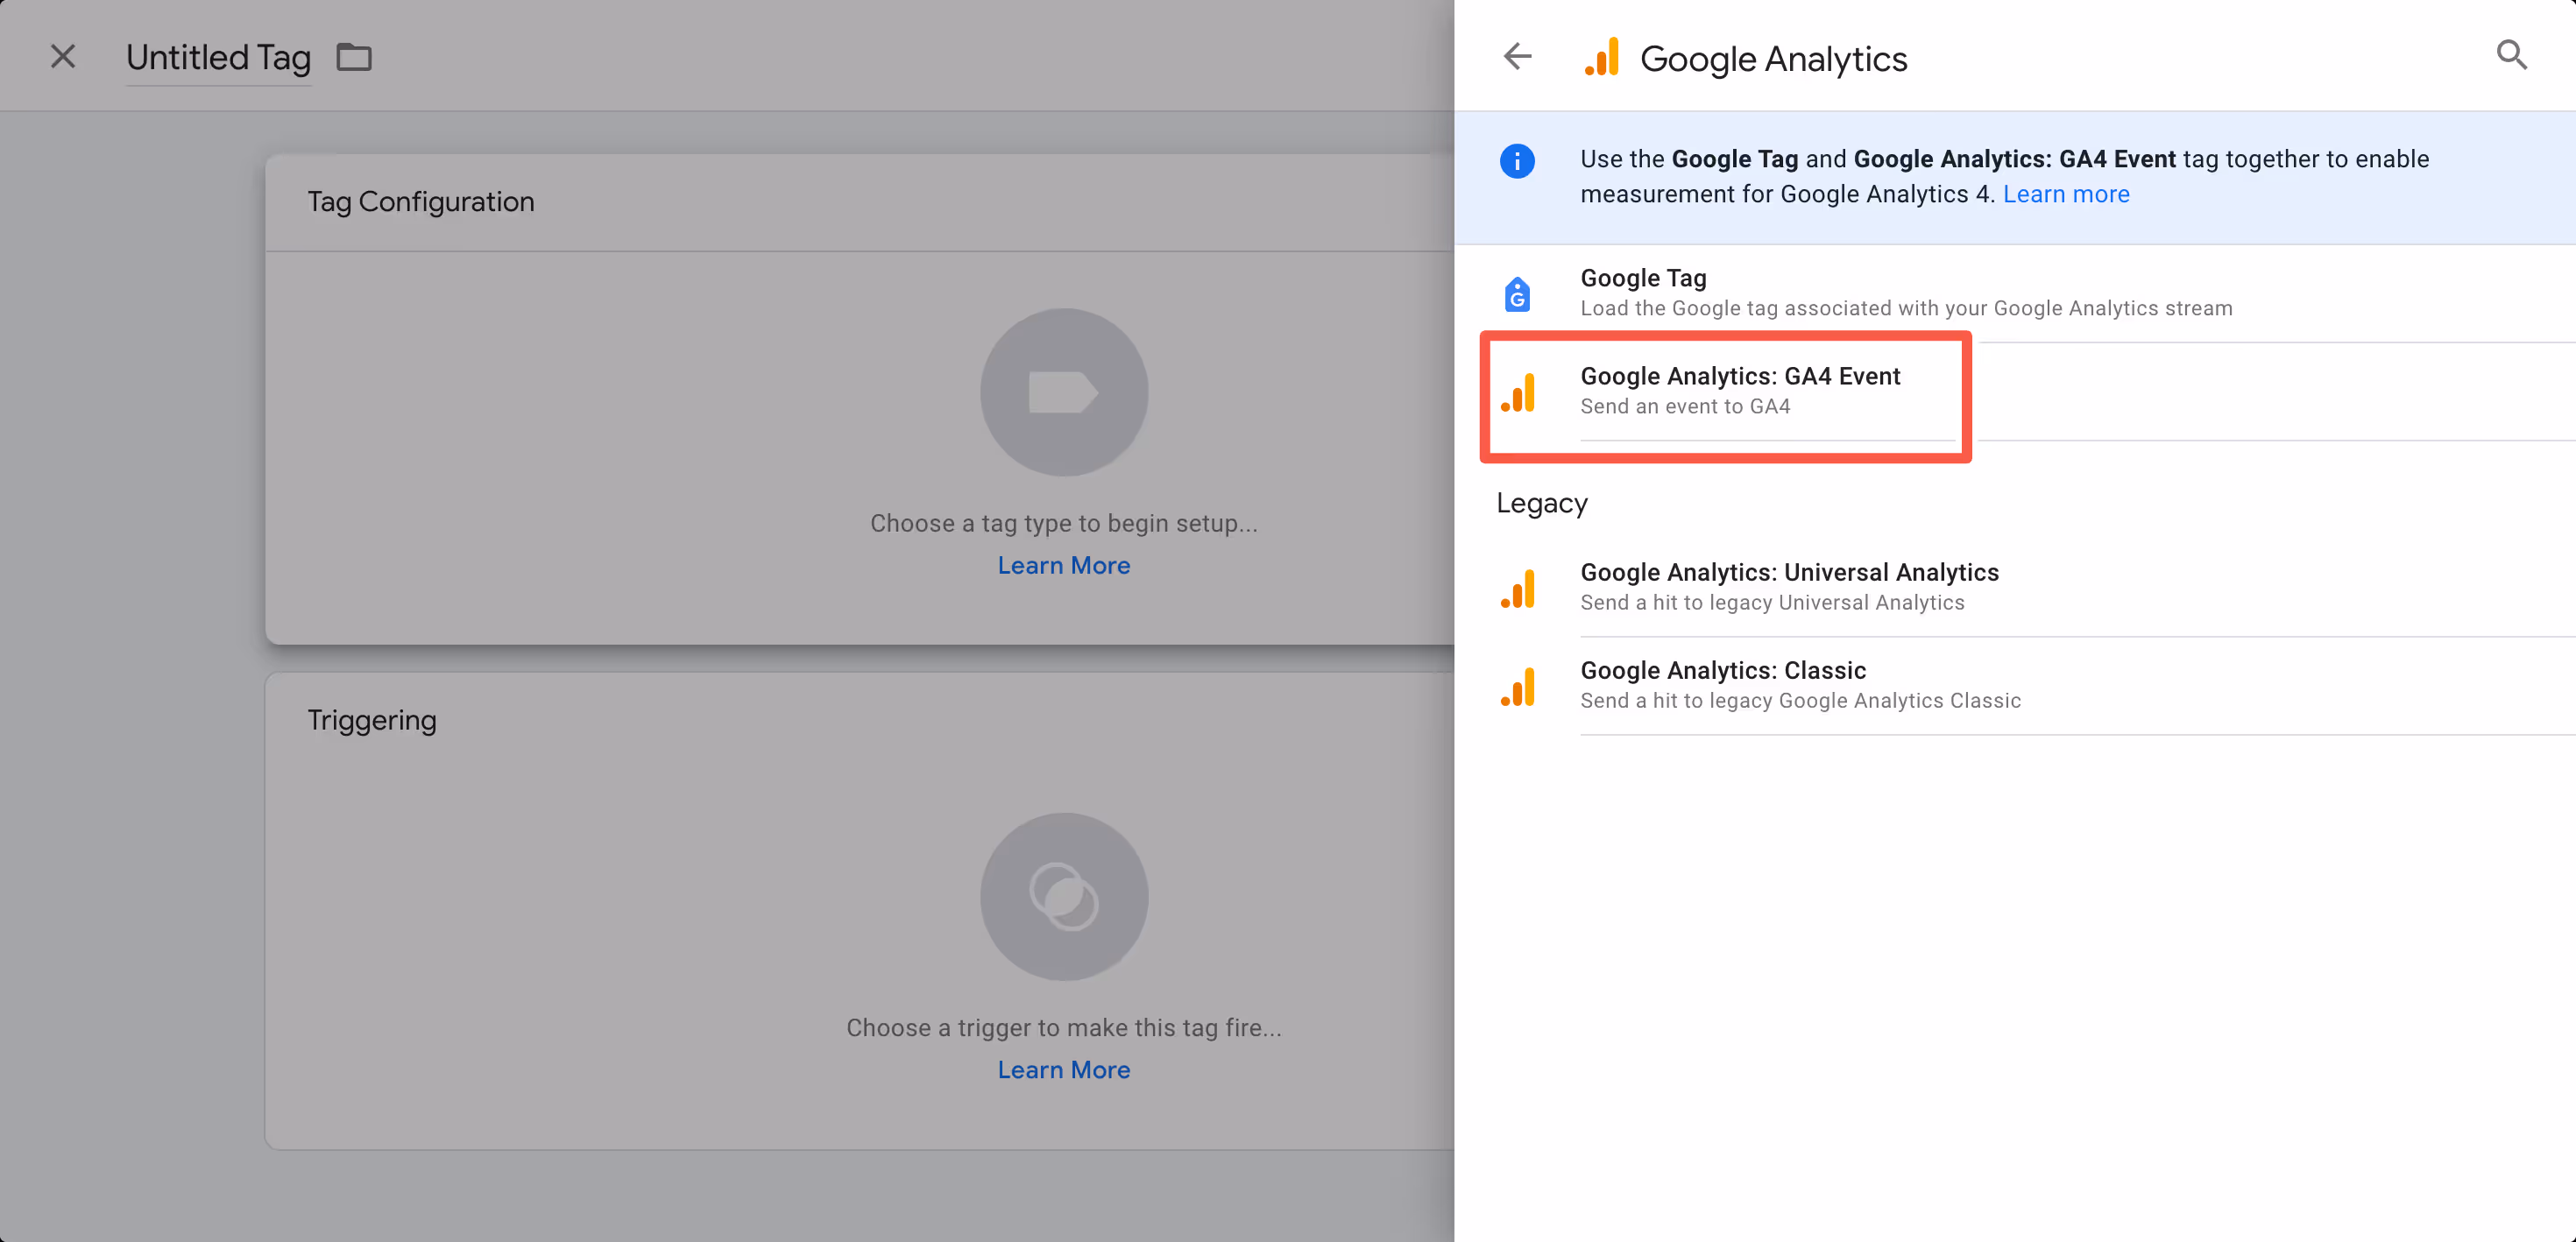
Select "Google Analytics" in the list of "Featured" tag types:
.avif)
Select the "Google Analytics: GA4 Event":
Fill in the “Measurement ID” field with the value you previously copied from your Google Analytics account:
.avif)
Expand the “User Properties” area and fill the “Property Name” field with “app_session”:
.avif)
On the “Value” field, click the small brick icon and pick the variable you created in the previous step:
.avif)
.avif)
Now click the “Triggering” block:
.avif)
Select “All pages”:
.avif)
Click “Save”:
.avif)
The first step now is to submit everything you created, so it goes live into production, you can do that by clicking the “Submit” button on the right side of the screen:
.avif)
Google will ask you for a few confirmations, but just click the “Publish” button until your changes are submitted.
If you never used Google Tag Manager before, you might need to add its code to your website, you can find all the details on how to implement the code to your website by clicking on your Tag Manager ID, here:
.avif)
Congratulations, if you followed all steps until this point, you should now be tracking all users that are viewing your website through the app.