People today do almost everything on mobile, and the businesses they use most sit on their home screens as apps. An app gives your business that spot: an icon one tap away, a login that stays saved and push notifications that bring people back.
Creating one is more manageable than it looks. Every app goes from idea to App Store through the same stages, and the decisions you make early on settle most of what it costs and how long it takes.
We’ve helped publish more than 2,000 apps since 2013, so we’ve seen which choices keep a project moving and which ones stall it.
This guide covers four ways to build an app, the ten steps from idea to launch, what each route costs and the mistakes to avoid.
How to Build an App: The Short Version
Most app projects follow the same ten steps, from the first idea to life after launch:
- Define the problem your app will solve.
- Validate the idea with real users.
- Decide what goes in the first version.
- Choose your platforms and how you’ll build the app.
- Map the user journey and build a prototype.
- Build the app.
- Test it on real iPhone and Android devices.
- Prepare your store listings and submit the app.
- Launch and promote it.
- Maintain and improve it.
The steps rarely run in a perfectly straight line. Testing can send you back to the design, and early feedback can change which features make the first version.
How Should You Build Your App?
There are a number of ways to build an app. You can code it yourself, use a no-code or AI app builder, or hire developers to build it for you. Alternatively, online brands already selling through their website can use MobiLoud to skip a lot of the work, and get a custom app that’s fully synced with their website.
| Route | Best suited to | Coding | Cost | Speed |
|---|---|---|---|---|
| Code it yourself | Developers and highly custom products | A lot | Low in cash, high in time | Slow |
| No-code or AI app builder | Prototypes and fairly standard apps | Little or none | Low to moderate | Fast |
| Freelancer, agency or in-house team | Custom apps, when you don't have the skills in-house | None | High | Moderate to slow |
| MobiLoud | Online brands already running a website | None | Low to moderate | Fast |
Code the App Yourself
Coding the app yourself gives you the most control, and it’s the natural route if you’re a developer or want to become one.
Native iPhone apps are written in Swift, in Apple’s Xcode, which is free but only runs on a Mac. Native Android apps are written in Kotlin, in Android Studio, and Google calls Android development Kotlin-first.
Building natively means two apps, one for each platform. Cross-platform frameworks cut that work down, as the diagram below shows. Flutter, React Native and .NET MAUI share the screens and the logic. Kotlin Multiplatform shares only the logic, while Ionic with Capacitor runs web code on both platforms.

The tradeoff is the amount of work. Beyond the screens, a production app usually needs a backend and database, user accounts, payments, integrations, analytics and crash reporting, plus updates for every new version of iOS and Android.
That’s worth it if learning app development is the goal. It’s a lot to learn on the job if the goal is getting a product to market.
Use a No-Code or AI-Assisted App Builder
No-code app builders let you put an app together from visual components, templates and ready-made features. Adalo and FlutterFlow, for example, both publish apps to the App Store and Google Play, and FlutterFlow lets you export the code.
AI app builders go a step further. You describe the app in plain language, and tools such as Rork or Adalo’s AI builder turn that description into a working app you can refine.
These tools work well for prototypes, internal tools, directories, booking apps and other fairly standard products.
Before you commit to a platform, check:
- Whether it publishes to both app stores
- Whether you can export your code and data if you outgrow it
- What the full production plan costs, beyond the entry price
- Who handles updates when Apple or Google changes its rules
AI makes the first version faster to produce, but you still make the product decisions. Someone also has to review what it generates, test it, protect your users’ data and maintain the app after launch.
Hire a Freelancer, Agency or Internal Development Team
When you outsource app development, you don’t need to code at all. A freelancer suits a small project with a clear scope, while an agency brings a full team for strategy, design, development, testing and project management.
Companies whose app is the product often end up building an in-house team, because the app will need constant work.
Before you ask for quotes, write down:
- The problem the app solves and its essential features
- Your platforms, budget and launch date
- Who will own the code and the developer accounts
- Who will maintain the app after launch
A clear brief makes proposals easier to compare. It also stops you paying developers to make product decisions you should settle before the build starts.
Transform Your Existing Site into an App with MobiLoud
The options above focus mostly on how to build a mobile app as a standalone project. For a web-first business wanting to launch an app that’s linked to their site, MobiLoud is a much easier way to do it.
MobiLoud transforms your website into a custom native app for iPhone and Android. Our team takes care of the build, publishing and ongoing maintenance, and the app itself is built on top of your existing web codebase, making it far easier to build and run.
For apps like ecommerce, news apps or web app companions, it’s the best way to build by far.
Learn more about how MobiLoud works
How to Create an App, Step by Step
Every app project will look a little different. But this ten-step process covers the typical ground from ideation through to the ongoing life of your app.
Step 1: Define the Problem Your App Will Solve
Every app needs a reason to exist, so start with the problem it solves for the people using it. Try to describe it in one sentence:
This app helps [a specific group of people] do [a specific task].
For example:
- An app that helps BJJ students find open mats while they travel
- An app that lets restaurant customers order ahead and skip the line
- An app that gives a brand’s repeat customers early access to new products
A clear problem statement makes every later decision easier. When someone suggests a new feature, you can ask whether it helps solve that problem or just makes the app bigger.
Then make sure it needs to be an app. Home screen access, push notifications, offline use, saved logins, the camera, location and frequent repeat use all make an app worth having.
If people will only use your product now and then, and it works well in a browser, a mobile-friendly website may be all you need.
Step 2: Validate the Idea
Validation tells you whether the problem is real, how people solve it today and what would make them try something new.
Depending on the project, you could:
- Interview potential users
- Survey your existing customers
- Read the reviews of competing apps
- Put up a landing page and collect sign-ups
- Offer the service by hand before you automate it
An established business often has the evidence already. Look at customer requests, mobile traffic, repeat purchases and the actions people take most often on your site.
Aim for enough evidence to justify the next step, without betting more than you have to. The details can wait for the prototype.
Step 3: Define Your Minimum Viable Product
Your first version should do one useful job well from start to finish. It doesn’t need everything you might add later.
List every action a user could take in the app, then sort them into three groups:
- Essential for launch
- Useful, but safe to add later
- Interesting ideas that aren’t a priority yet
A shopping app, for example, needs browsing, search, product pages, login, a cart, checkout and order tracking on day one. Wish lists, loyalty games and social features can wait until the core journey works.
Write the scope down before development starts. A short document covering the user, the main journeys, the essential features, the integrations and what’s left out is enough to keep everyone building the same app.
Step 4: Choose Your Platforms and Development Route
With the first version defined, you can pick the platforms and the development route that fit it. Weigh your budget, launch date and team’s skills against how custom the app needs to be and who will maintain it.
Most businesses need both iPhone and Android. Android accounts for about 69% of mobile web traffic worldwide, while iPhones account for about 59% in the US, according to StatCounter.
If your audience uses both, a cross-platform framework, an app builder or MobiLoud saves you building everything twice. Native development makes more sense when the app leans hard on platform-specific features or demanding graphics.
Step 5: Map the User Journey and Create a Prototype
Before you design how the app looks, map how people will move through it. Start with the journey that matters most, which in a shopping app looks like this:
Open the app → find a product → choose a size → add it to the cart → check out → see the order confirmation
Sketch the screens that journey needs and how they connect, on paper or in a design tool. These wireframes show the structure, not the branding.
The storyboard below, made with Milanote’s app storyboard template, lays out a shopping app’s splash screen, sign-in, onboarding and product pages, with arrows for the taps that connect them.
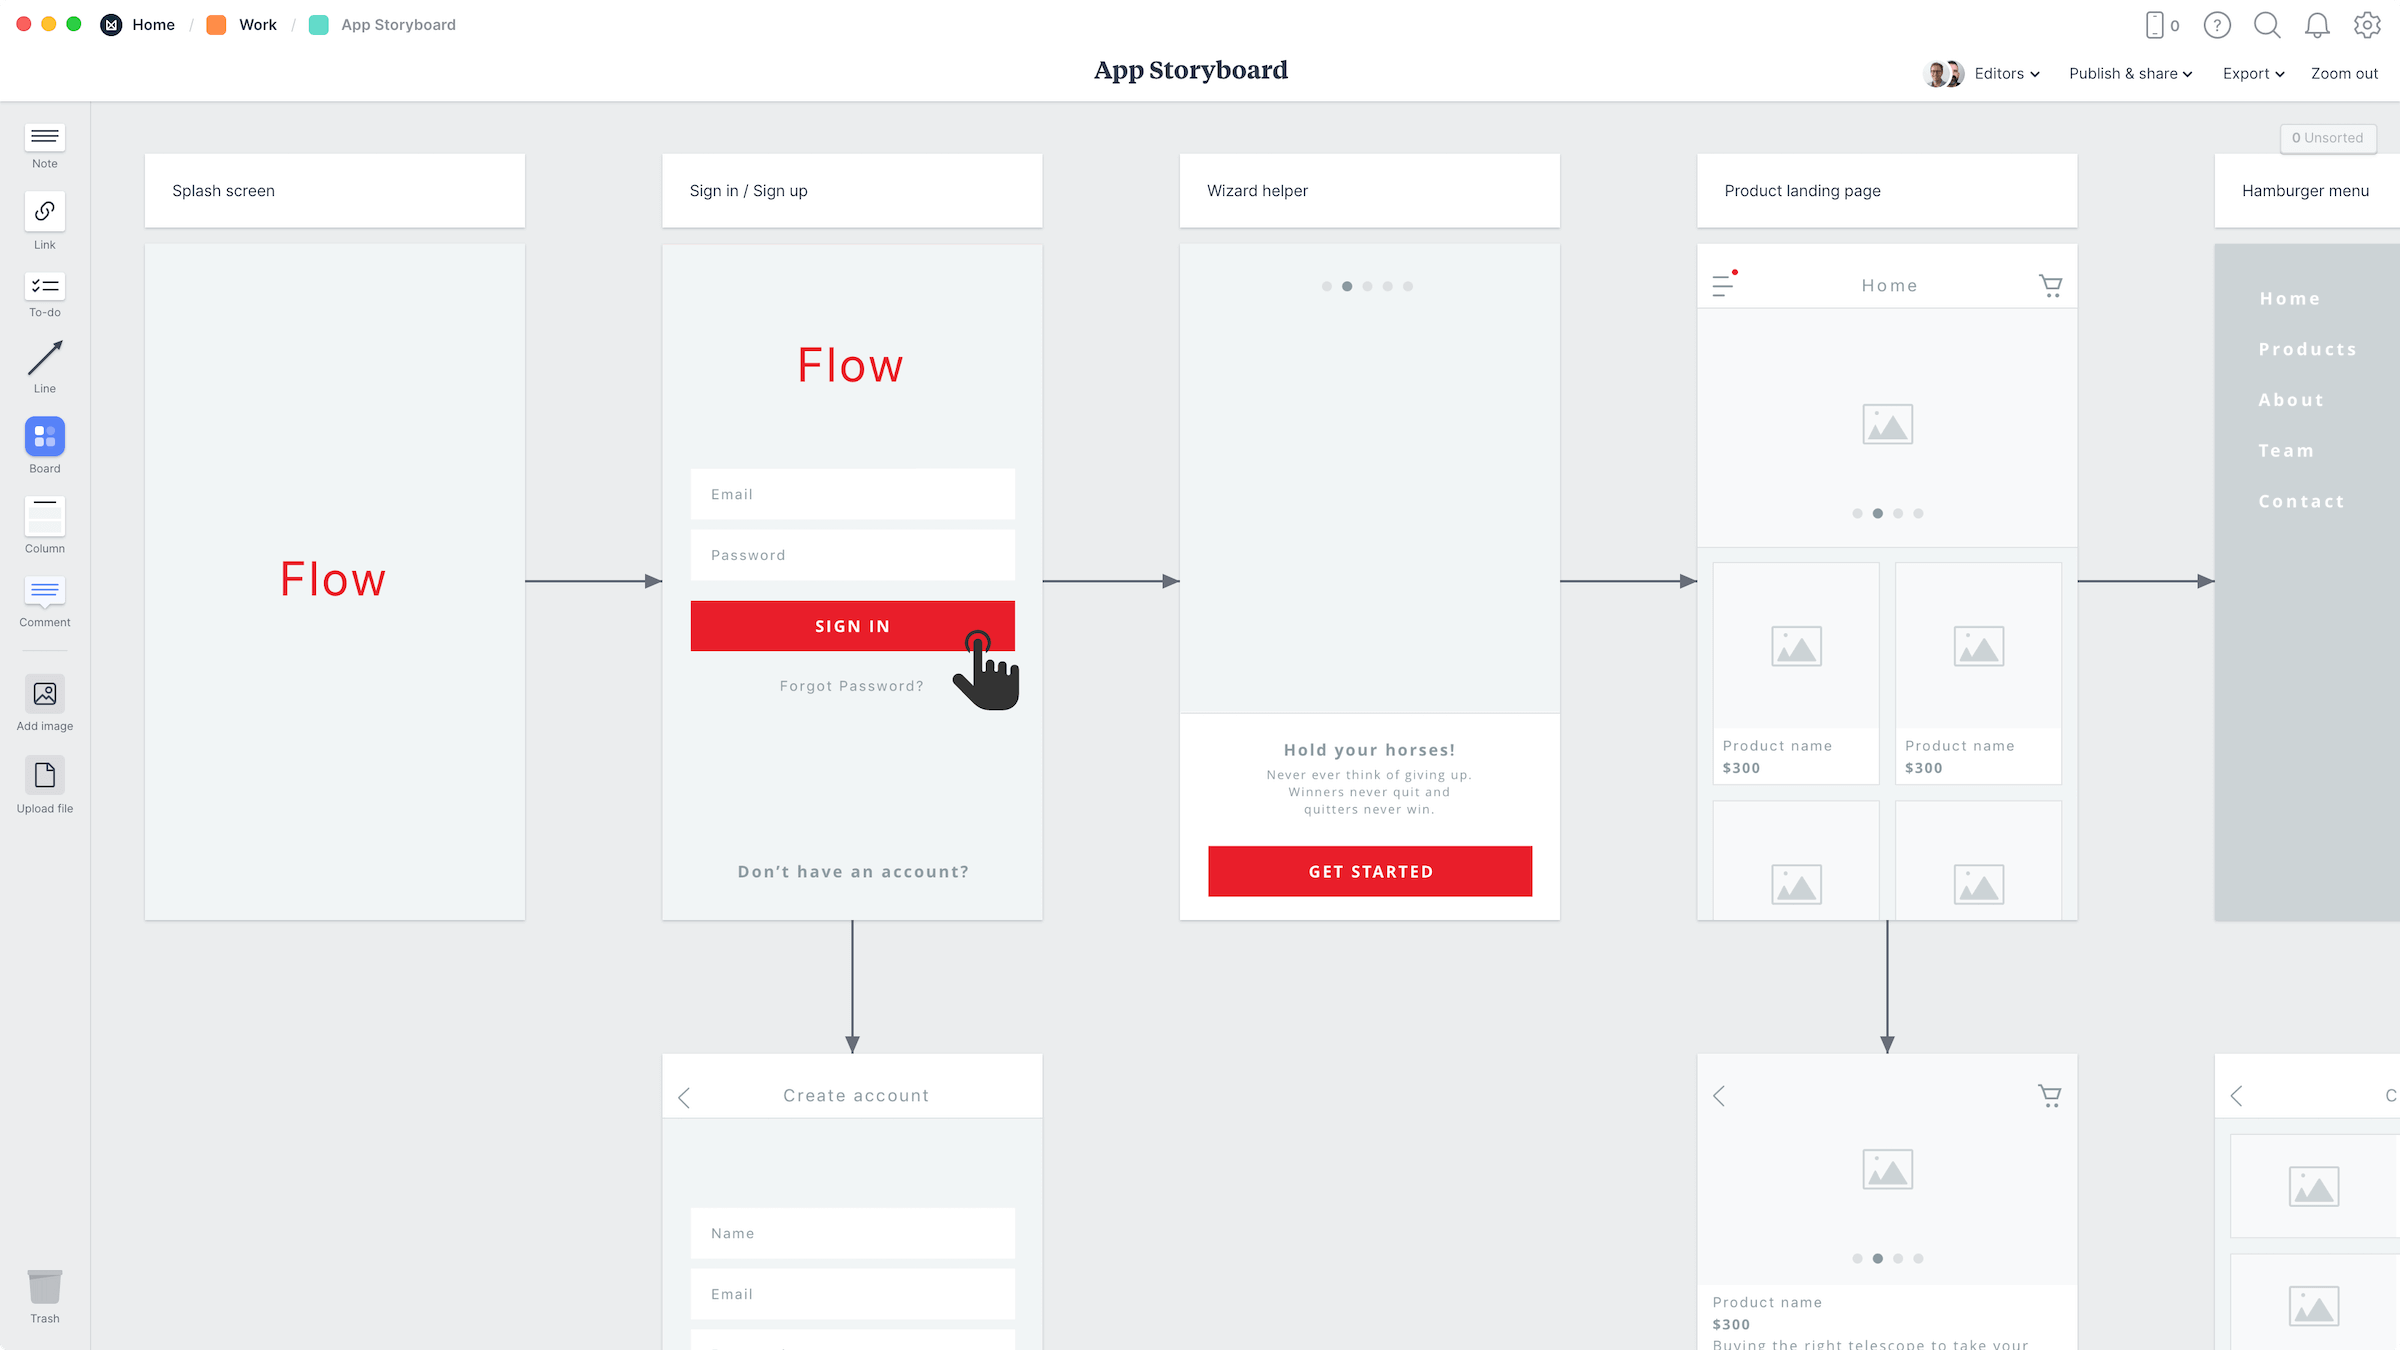
Once the flow makes sense, turn the wireframes into a clickable prototype and put it in front of a few potential users. Watch where they hesitate, tap the wrong thing or ask what something means, because those fixes cost far less now than in a finished app.
Then design the look, from colors and type to buttons and icons, with Apple’s Human Interface Guidelines and Google’s Material Design alongside your own brand.
Step 6: Build the App
The next step is the most time-intensive: actually building the app.
In any project, the following things need to be built:
- Frontend: the screens and interactions people see
- Backend: the database, servers and business logic behind the app
- Accounts: sign-up, login and account security
- Integrations: payment providers, CRMs, ecommerce platforms and other services
- Device features: push notifications, location, camera, biometrics and storage
- Analytics and monitoring: what people do in the app and the crashes they hit
How exactly these parts are built depends on the development approach you choose.
A no-code builder handles much of this in a visual editor. If you’re hiring a development team or an agency, or building it yourself, these are all elements that have to be coded by hand.
With MobiLoud, it’s custom work done by our team, but it reuses a lot of what already exists on your site, so the process is faster (and more affordable) than building from scratch.
Step 7: Test the App on Real Devices
An app that works in a simulator or a browser preview isn’t ready until it works on real devices. Test it on the phones, screen sizes and operating system versions your customers actually use.
Check:
- Sign-up, login and password reset
- Navigation and the back button
- Payments and checkout
- Links and deep links
- Push notification permissions
- Slow or patchy connections
- Loading, empty and error states
- Accessibility
Get people outside your team to test it too. Anyone who already knows how the app works will avoid the mistakes a new user makes.
Both stores have tools for testing before release. Apple’s TestFlight lets you invite up to 100 people from your team and up to 10,000 external testers. Google Play’s internal testing track takes up to 100 testers, with closed and open tracks for wider tests.
Use test accounts and payment sandboxes wherever you can, so testing doesn’t create real orders, messages or charges.
Step 8: Prepare and Submit the App
To publish your app, you need a developer account with each store. The Apple Developer Program costs $99 per membership year, and Google Play charges a one-time $25 registration fee.
Personal Google Play accounts created since November 2023 have an extra step. Before they can publish, they must run a closed test with at least 12 testers who stay opted in for 14 days in a row.
Each store listing also needs:
- An app name and icon
- A description and screenshots
- A category and age rating
- A support link and privacy policy
- A summary of the data your app collects, for Apple’s App Privacy details and Google Play’s Data safety form
- A demo login for the reviewer, if parts of the app need one
The top of your listing does a lot of the selling. Sephora’s App Store page leads with the app name, a subtitle that says what the app offers and its rating:
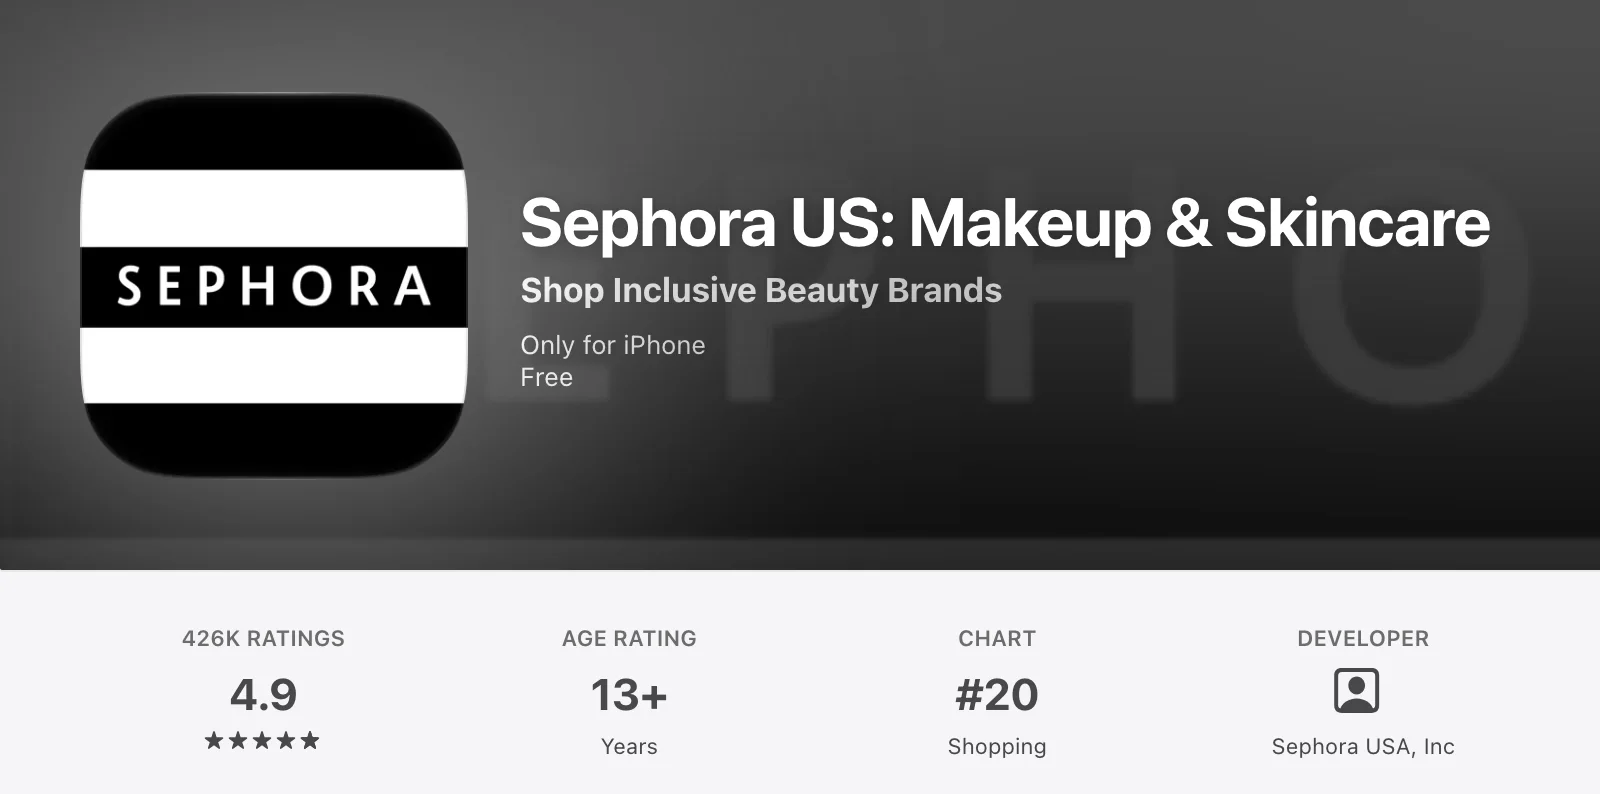
Getting that right is the job of App Store Optimization, which turns more of your listing’s visitors into downloads.
Apple reviews every app against its App Review Guidelines, and Google checks apps against its developer policies. Apple typically reviews at least half of submissions within 24 hours and 90% within 48 hours. Reviewers can still ask questions or reject a first submission, so leave time for that in your launch plan.
Step 9: Launch and Promote the App
Publishing the app doesn’t mean anyone will find it, so plan the launch before the app reaches the stores. Your best first audience is usually the people who already know your business.
Depending on the app, your launch plan could include:
- An announcement to your email list
- Smart app banners on your website
- Social posts and SMS campaigns
- QR codes in stores or on packaging
- A reward for early users or referrals
Give people a clear reason to download. “We have an app now” isn’t a reason on its own, while faster checkout, app-only offers, early access, loyalty perks and useful notifications are.
Learn more about launching your mobile app
Step 10: Maintain and Improve the App
Launch is the start of your app’s working life, not the end of the project. After release, track these numbers to decide what to fix and what to build next:
- Installs and where they come from
- How many people complete the core journey
- Retention
- Crashes, ratings and reviews
- Revenue or the other results the app is for
The app also needs regular updates to stay in the stores. Apple raises the minimum Xcode and SDK version for new uploads, and Google Play requires new apps and updates to target a recent version of Android.
Plan for maintenance in your budget from the start. If someone else builds the app, agree who handles updates before the project ends.
How Much Does It Cost to Create an App?
Creating an app can cost anything from your own time to six figures, and the build route is the biggest factor. The most common budget for custom app projects on Clutch is $10,000 to $50,000, according to its pricing guide.
Here’s what you pay for on each route, and how long it usually takes:
| Route | What you pay for | Typical timeline |
|---|---|---|
| Code it yourself | Your time, plus developer accounts, hosting and third-party services | Several months or longer |
| No-code or AI app builder | A monthly subscription, plus paid integrations and usage | Days to weeks for a prototype, longer for a reliable production app |
| Freelancer or agency | A project fee, plus maintenance and hosting | Months |
| MobiLoud | A monthly subscription that covers the build and ongoing updates | 2 to 4 weeks |
Clutch puts the typical custom app project at about 11 months. Complexity matters as much as the route, since logins, payments, live chat, location, offline features, video and unusual integrations all add time and cost.
Every route also has running costs, from hosting and store fees to maintenance and marketing. A cheap first build gets expensive if it can’t grow with the product, while an expensive build is wasted on an idea nobody has tested.
Learn more about what it costs to build an ecommerce app
How to Create a Mobile App (When You Already Have a Website)
If your business already serves customers on the web, you’re much closer to an app than you might think. Core features like products, content, accounts and checkout already exist, so the project is about converting your website into an app rather than building a new platform.
There are three ways to do it, depending on how much you want to invest, how app-like the result needs to be and how much you want to maintain.
Progressive Web App
A Progressive Web App, or PWA, adds app-like features to your website, such as a home screen icon and offline pages. People get it through their browser, so you keep a single web codebase.
PWAs are quick to launch, but they don’t come with an App Store listing, and installing from a browser is less familiar than downloading from a store. The features you get also vary between Android and iPhone.
Separate Native Frontend Connected Through APIs
You can also build a fully separate app interface that connects to your website’s backend through APIs, either your platform’s own or custom ones your team builds. The APIs let the app and the site share data, so an order placed in the app shows up in your store.
This gives you the most freedom to design a distinct app. It’s the right call when the app needs to work very differently from your website.
The cost is a second frontend to build and maintain. Every feature, integration and change has to be built for the app as well as the site, so the extra freedom only pays off when there’s a clear reason for the two to differ.
A Custom Native App From MobiLoud
MobiLoud builds a custom native app, powered by your existing website. The same underlying code runs both the app and website, but users on each channel get an experience customized to where they are, and the type of user they are.
This approach requires minimal rebuilding, because all the core functionality and data from your site directly carries over to the app. MobiLoud’s team shapes and builds the native experience, and you’re able to manage and update content through your web platform, not a separate CMS or codebase.
MobiLoud’s way is a new way to build mobile apps, and the best way to skip 90% of the cost and complexity of a custom app build, while still retaining the flexibility and quality you need from a native app.
The John Varvatos app is one of the 2,000+ apps launched with MobiLoud over the last decade plus: a custom native app for a global designer fashion brand, incorporating the best parts of a native app with the best parts of their existing web experience.

"We tried a handful of different options in the market in terms of app builders, as well as reaching out to countless freelancers. Nothing out there provided us with the ease and accessibility that MobiLoud did to our team. We have a small team, with no app development experience. We needed someone that would hold our hand through the process, and guide us on how to maintain the app post-launch."
Common App Development Mistakes
Most app development mistakes happen before anyone writes much code, which is also when they’re cheapest to avoid.
Building Before Validating the Problem
Development feels like progress, but a finished app can’t fix weak demand. Talk to users and test the idea before you commit to a big build.
Trying to Launch With Every Possible Feature
Every extra feature adds design, development and testing work, plus more for users to figure out. Launch the smallest version that does the core job well, then let real behavior decide what comes next.
Choosing the Tool Before Defining the Product
A tool can look great in a demo and still be a poor fit for what you need. Define the users, journeys, integrations and constraints first, then pick the route that supports them.
Ignoring the Cost of Maintenance
The first build is only part of the cost. Apps need bug fixes, security updates, support for new OS versions and ongoing improvements, so decide who owns that work and how it’s paid for before launch.
Testing Only in a Preview or Simulator
Real devices show problems a preview misses, like keyboard behavior, permissions, performance, notifications and patchy connections. Test the whole app with realistic accounts and data before you submit it.
Assuming App Store Approval Is Automatic
Apple and Google reject apps that break their policies or don’t offer enough value. According to Apple, over 40% of unresolved review issues fall under Guideline 2.1, App Completeness, which covers crashes, placeholder content and incomplete information.
Read the store requirements early, especially if your app relies on web content, handles sensitive data or sells digital goods.
Rebuilding an Existing Business Without Considering the Duplication
If your products, accounts, checkout and integrations already work on your website, rebuilding them in a separate app creates work that never ends. Do it only when a separate app experience is worth maintaining two products.
Final Thoughts
An app can be a side project, a startup’s core product or a new channel for an established business. Whichever it is, the projects that succeed start the same way: a real problem, an idea tested with real users and a first version that does one job well.
The right way to build it comes down to your skills, your budget and what the app needs to do.
Keep in mind what you’re putting into the project, and what it’ll take long-term to keep it running. A custom build can make sense if your goal is just to learn how app development works and do your own project on the side; but for a legitimate business app, it may simply be too much to maintain over a long time horizon.
For web-first brands like ecommerce stores, MobiLoud is here to make it easier. Get in touch with us and book a demo if you’re looking for an easy way to get a custom app, fully synced with your store.