Having an idea for an app is the easy part. Working out what to build, how to build it and how to get it into people’s hands is where things become more complicated.
There’s more than one way to create a mobile app. You could learn to code it yourself, use a no-code or AI-assisted builder, hire a development team or build on a website or web product you already have. Each route comes with different costs, timelines and tradeoffs.
At MobiLoud, we’ve been building and launching mobile apps since 2013, and have helped publish more than 2,000 apps. One thing we’ve learned is that choosing the right development approach matters just as much as the idea itself.
We’re going to walk you through that - and more - below.
This guide breaks down the complete process of creating a mobile app, from validating the initial idea to launching it in the Apple App Store and Google Play, to help you see your idea flourish and come to life.
Key Takeaways
- Start with a clear problem, target user and reason for creating the app.
- Validate the idea before putting significant time or money into development.
- Keep the first version focused on the few features needed to deliver its core value.
- Choose between coding, no-code or AI-assisted tools, hiring a development team, or building from an existing website.
- Test the app on real devices before submitting it to the app stores.
- Plan for promotion, maintenance and future updates from the beginning.
How to Build an App: The Short Version
The exact process will look different depending on what you’re building, but in general, most mobile app projects follow the same path:
- Define the problem your app will solve.
- Identify the people who will use it.
- Validate that there’s real demand for the idea.
- Decide which features belong in the first version.
- Choose how you’ll build the app.
- Map the user journey and create a prototype.
- Build or configure the app.
- Test it on real iOS and Android devices.
- Prepare your app-store listings and submit the app.
- Launch, promote and continue improving it.
You don’t necessarily have to complete these steps in a perfectly straight line. App development is usually iterative. Testing may send you back to the design, and early customer feedback may change which features make the final cut.
But before getting into the process in more detail, it helps to understand the main ways an app can be built.
Choose the Right Way to Build Your Mobile App
Your development route affects almost every part of the project, including its cost, timeline, flexibility and how much technical work you’ll take on yourself.
Here’s a quick comparison:
| Build Route | Best For | Coding Required From You | Relative Cost | Relative Speed |
|---|---|---|---|---|
| Code it yourself | Developers, people learning to code and highly custom products | High | Low cash cost, high time cost | Slow |
| Use a no-code or AI-assisted builder | Prototypes and relatively standard apps | Low | Low to moderate | Fast |
| Hire a freelancer, agency or internal team | Custom apps without the required expertise in-house | None personally | High | Moderate to slow |
| Build from an existing website | Businesses like ecommerce, with an existing online property | Low | Low to moderate | Fast |
None of these routes is automatically the best. The right choice depends on what the app needs to do and what you already have.
Let’s look closer at each one now.
Code the App Yourself
If you know how to code, or you want to learn, you can build the app yourself.
For a native iOS app, that usually means working with Swift and Xcode. Native Android development commonly uses Kotlin and Android Studio. You can also use a cross-platform framework such as Flutter or React Native to build much of the app once and release it on both platforms.
Coding from scratch gives you the most control. It can make sense if the app needs unusual device functionality, highly specialized interactions or technology that standard app builders don’t support.
The tradeoff is the amount of work involved. A production app may need:
- An iOS and Android frontend
- A backend and database
- User authentication
- Payment or subscription handling
- API integrations
- Security and privacy controls
- Analytics and crash reporting
- Testing and deployment systems
- Ongoing compatibility updates
If your main goal is to learn app development, taking this route can be worthwhile even if it takes longer. If your priority is getting a commercial product to market, consider whether learning everything as you go is the best use of your time.
For a closer look at the Apple-specific route, read our guide to developing an iOS app.
Use a No-Code or AI-Assisted App Builder
No-code tools let you assemble an app using visual components, templates and prebuilt functionality. AI-assisted builders go a step further, allowing you to describe screens or features in plain language and generate some of the design, logic or code.
These tools make it much easier to create:
- Simple customer-facing apps
- Internal business tools
- Directories
- Booking apps
- Community products
- Content apps
- Early prototypes
- Minimum viable products
You still need to make the product decisions. The tool won’t automatically know which features matter, how the user journey should work or what will make someone return after downloading the app.
That’s the part that still needs a human’s touch.
Before choosing a platform, check:
- Whether it produces an app that can be published in both major app stores
- Which features and integrations it supports
- Whether you can export the code or data
- How it handles user accounts, payments and security
- What happens if you outgrow the platform
- Whether the company handles app-store submission
- Who is responsible for updates when Apple or Google changes its requirements
- What the full production plan costs, rather than just the entry-level price
AI can make the first version faster to produce. It doesn’t remove the need to review the generated code, test the product, protect user data or maintain the app after launch.
Hire a Freelancer, Agency or Internal Development Team
You don’t need to know how to code if you hire someone else to build the app.
A freelancer can be a good fit for a smaller project with a clearly defined scope. An app development agency can provide a larger team covering strategy, design, development, testing and project management.
Companies that expect the app to become a major part of their product may eventually build an internal app team.
Before hiring anyone, get clear on:
- The problem the app needs to solve
- The essential features
- Which platforms you want to support
- Your budget and desired launch date
- Who will own the code and developer accounts
- What’s included in testing and app-store submission
- Who handles maintenance after launch
- How changes to the scope will be priced
A detailed brief makes it easier to compare proposals. It also reduces the risk of paying developers to make product decisions that should have been settled before the build started.
Build From an Existing Website or Web Product
Not every mobile app needs to start from an empty screen.
If your business already runs through a website, you could already be sitting on 90% of the user experience of your app.
Take an ecommerce brand for example: an ecommerce app and an ecommerce site are not so different. Both are a homepage, catalog and checkout.
If you’re launching an app for your ecommerce brand, you probably don’t need to build a whole new product from scratch. It’s better to build on top of all the functionality that already exists on your site.
You then have several possible routes:
- Improve the website and make it installable as a Progressive Web App
- Use the existing website as the live foundation for an iOS and Android app
- Build a separate mobile frontend connected to the website through APIs
The first two options can dramatically reduce the amount of work involved. The third gives you more separation and control, but creates another interface that needs to be developed, synchronized and maintained.
We’ll look at these options more closely later in the guide.
How to Create an App, Step by Step
Once you understand the possible development routes, you can start shaping the app itself. The following steps apply whether you plan to build it personally or bring in someone else.
Step 1: Define the Problem Your App Will Solve
Start with the problem. The reason your app should exist.
Try to describe the app in one sentence:
This app helps [specific group of people] do [specific task or achieve a particular outcome].
For example:
- An app that helps BJJ students find open mats while traveling
- An app that lets restaurant customers order ahead and collect without waiting
- An app that gives an ecommerce brand’s repeat customers faster access to new products and offers
- An app that helps field staff complete inspections without returning to the office
A clear problem statement makes later decisions easier. When someone proposes another feature, you can ask whether it helps solve the core problem or simply makes the app bigger.
You should also consider why this needs to be a mobile app. Home screen access, push notifications, offline use, saved login, camera access, location and frequent repeat use can all make an app worthwhile.
If the product will only be used occasionally and works comfortably in a browser, a mobile-friendly website may be enough.
Step 2: Validate the Idea
An app can be technically impressive and still fail because people don’t need it.
Validation helps you learn whether the problem is real, how people currently solve it and what would persuade them to try something new.
Depending on the project, you could:
- Interview potential users
- Survey existing customers
- Study competing apps and their reviews
- Create a landing page explaining the idea
- Collect sign-ups or preorders
- Run a small paid campaign
- Show users a clickable prototype
- Offer the service manually before automating it
Pay particular attention to complaints in competing app reviews. They can show you where users struggle, which features they value and which promises existing products aren’t delivering.
For an established business, you may already have useful evidence. Look at customer requests, mobile website traffic, repeat purchase behavior and the actions users perform most often.
Validation doesn’t mean proving that every detail is correct. The goal is to find enough evidence to justify taking the next step without making a much larger bet than necessary.
Step 3: Define Your Minimum Viable Product
The first version of the app should do something useful from beginning to end. It doesn’t need to do everything you may eventually want.
List the main actions a user could take, then divide them into three groups:
- Essential for launch
- Useful, but safe to add later
- Interesting ideas that aren’t currently a priority
An ecommerce mobile app, for example, might need browsing, search, product pages, login, cart, checkout and order tracking. More advanced loyalty features, wish lists, gamification and social functionality could wait until the core shopping journey works.
A focused first version is easier to build, test and explain. It also gives you a faster way to learn whether people want the product.
Write the scope down before development begins. This could be a straightforward requirements document covering:
- The target user
- The core problem
- The main user journeys
- Essential screens
- Required features
- Integrations
- Platforms and devices
- Security or compliance requirements
- What isn’t included in the first release
This doesn’t need to be a hundred-page technical specification. It just needs to be clear enough that everyone involved is building the same product.
Step 4: Choose Your Platforms and Development Route
With the first version defined, you can make a more informed decision about how it should be built.
Consider:
- Whether you need iOS, Android or both
- Your available budget
- How quickly you want to launch
- Your technical skills and internal resources
- The level of customization required
- Whether the app needs advanced device functionality
- What systems it must connect to
- How frequently the product will change
- Who will maintain it after launch
If your audience uses both iOS and Android, a cross-platform framework or app builder may reduce duplicated work. Native development may be more suitable when the app depends heavily on platform-specific features or particularly demanding interactions.
Avoid choosing a framework or tool simply because it’s popular. The technology needs to fit the product and the team responsible for maintaining it.
Step 5: Map the User Journey and Create a Prototype
Before polishing the visual design, map out how someone will move through the app.
Start with the most important journey. For a shopping app, that might look like:
- Open the app
- Find a product
- View its details
- Choose an option
- Add it to the cart
- Check out
- View the order confirmation
Sketch the necessary screens and the connections between them. These early wireframes can be made on paper or in a design tool. Their job is to show the structure, not the finished branding.
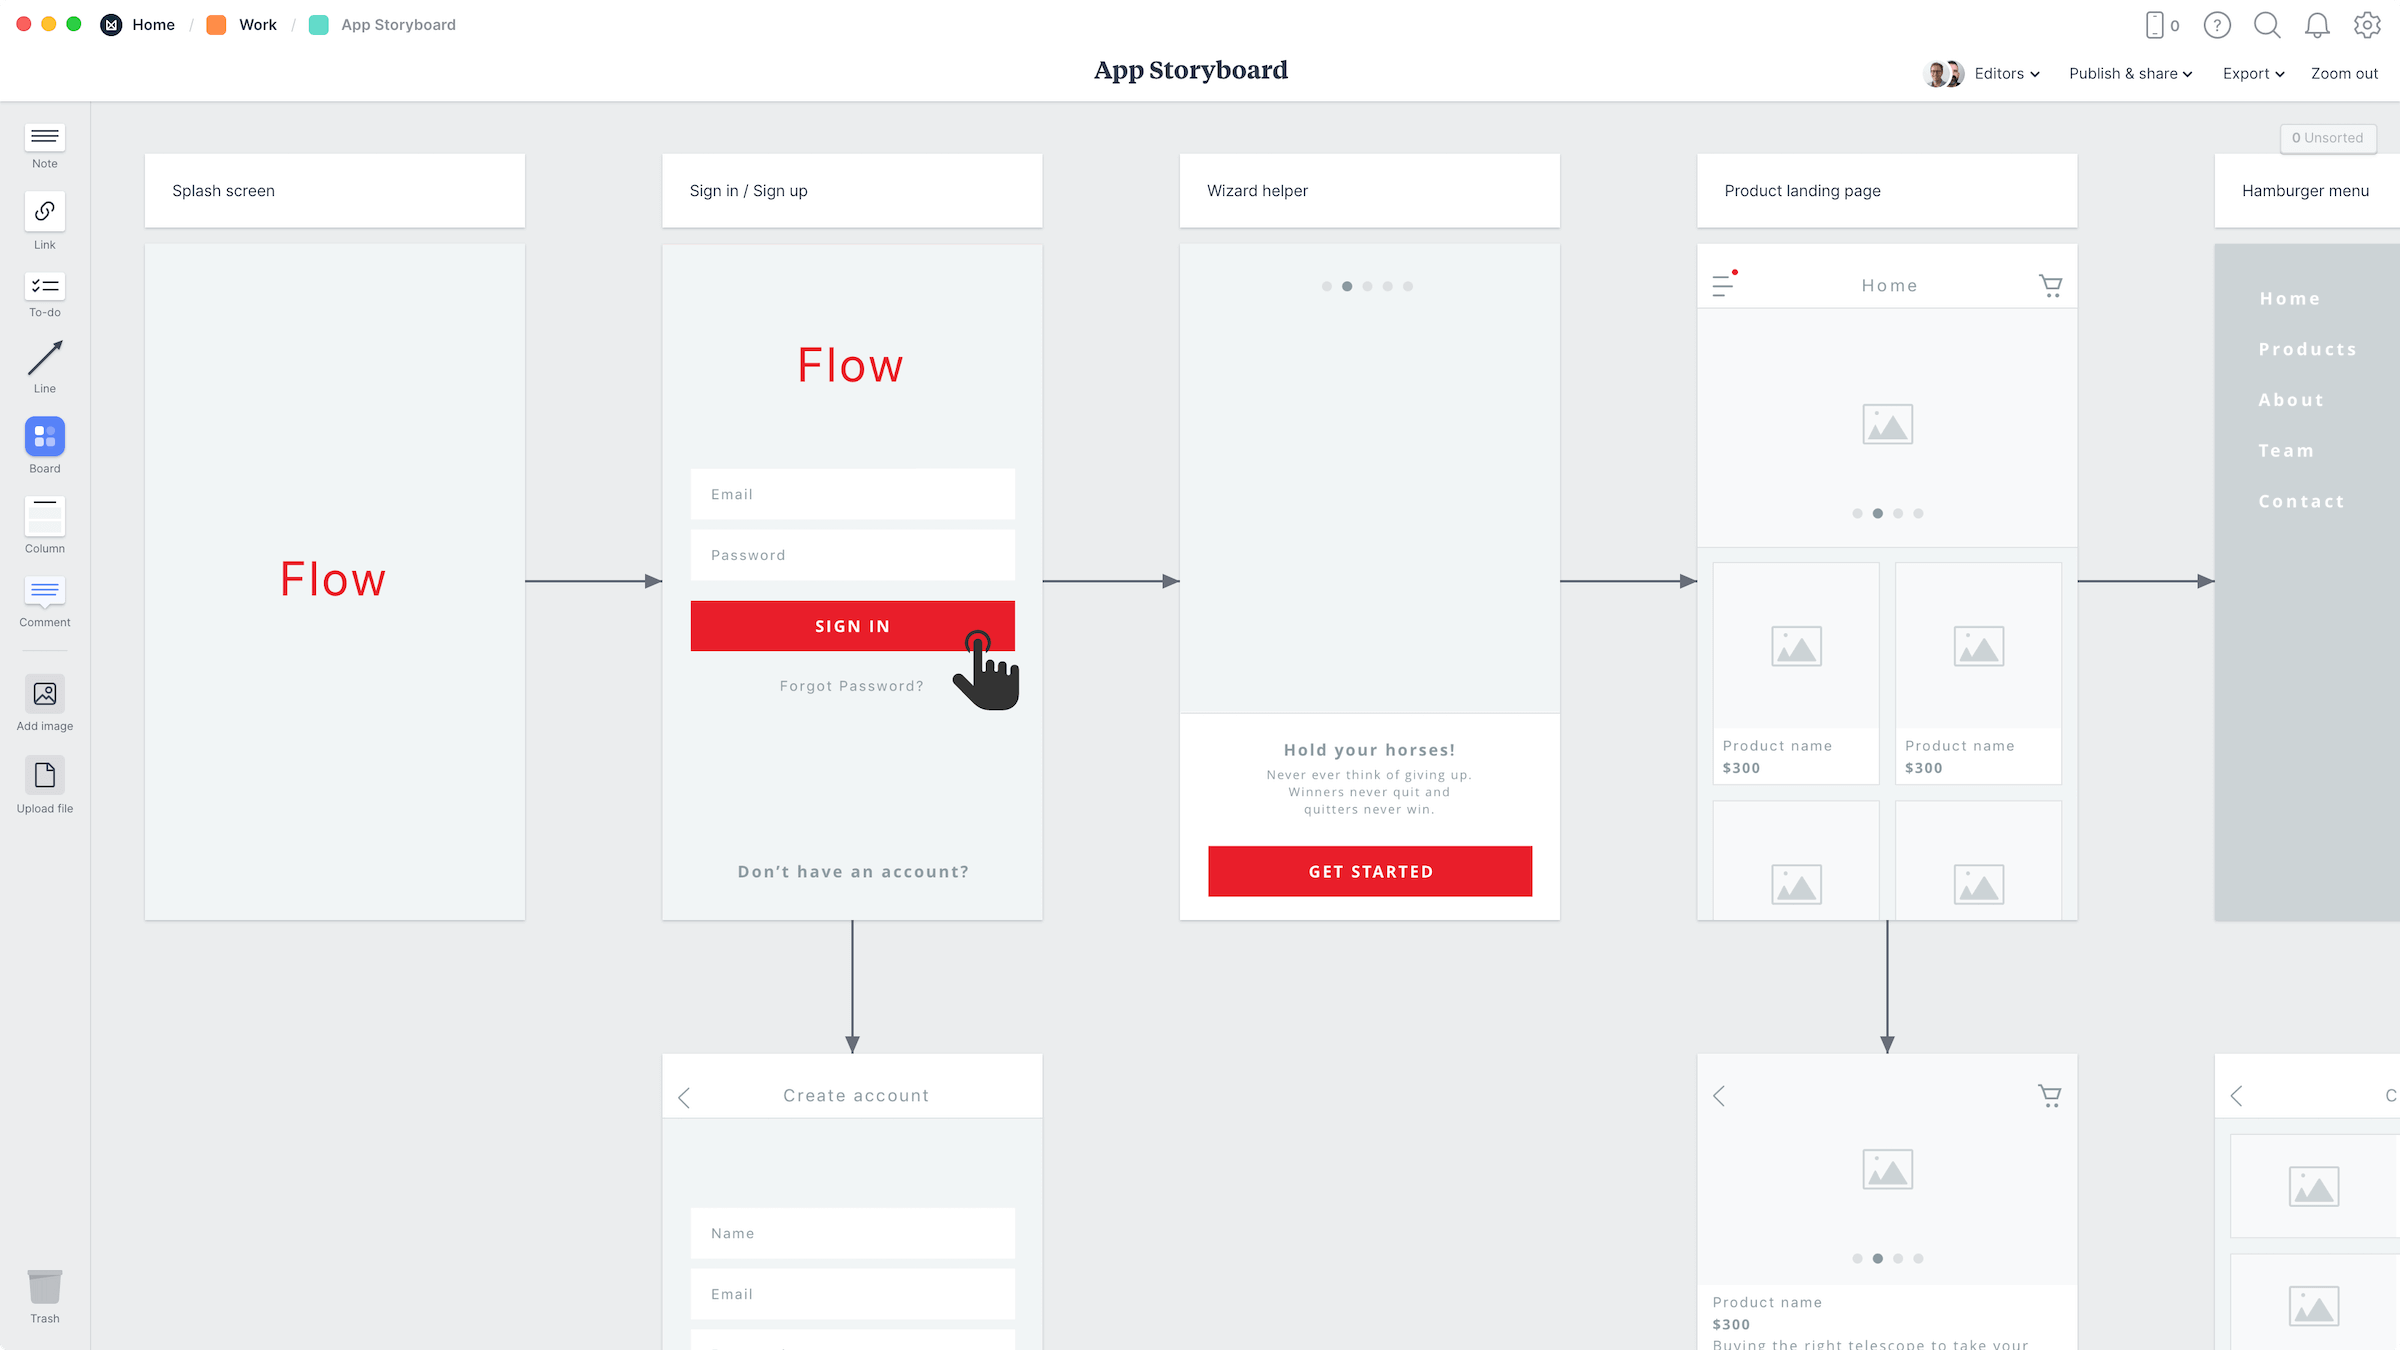
Once the flow makes sense, turn the wireframes into a clickable prototype. Put it in front of a few potential users and watch what they do.
Notice where they hesitate, tap the wrong area or ask what something means. Those moments are far cheaper to fix in a prototype than in a completed app.
After the flow works, you can develop the visual system: colors, typography, buttons, icons, spacing, imagery and interaction states. Use Apple’s Human Interface Guidelines and Google’s Material Design guidance as useful references, while keeping the experience consistent with your wider brand.
Step 6: Build the App
The exact build process depends on the route you selected.
A custom project usually involves work across several connected layers:
- Frontend: The screens and interactions users see
- Backend: The database, servers and business logic behind the app
- Authentication: Login, passwords, social sign-in and account security
- Integrations: Connections to payment providers, CRMs, ecommerce platforms or other services
- Native functionality: Push notifications, location, camera, biometrics and device storage
- Analytics: Events that show how people use the app
- Error monitoring: Systems for detecting crashes and technical problems
If you’re using a no-code builder, much of this may be configured through a visual interface. If the app is based on an existing website, the backend, content and integrations may already be in place.
Build in small, testable stages. Get the core journey working before spending time on secondary features or visual details that don’t affect whether the product is useful.
Step 7: Test the App on Real Devices
An app that works in a browser preview or simulator isn’t necessarily ready to launch.
Test it on a representative range of real devices, screen sizes and operating-system versions. You don’t need to own every phone on the market, but you should cover the devices your target audience is likely to use.
Check:
- Registration, login and password recovery
- Navigation and back-button behavior
- Forms and validation messages
- Payments and checkout
- Links and deep links
- Push notification permissions
- Slow or unstable connections
- Empty, loading and error states
- Accessibility
- Analytics tracking
- Battery and data usage
- App speed and responsiveness
- What happens when the app is closed and reopened
Get people outside the development team to test it too. Someone who already knows how the app works will naturally avoid many of the mistakes a new user makes.
Apple’s TestFlight and Google Play’s testing tracks let you distribute pre-release versions to testers before the public launch.
Pay particular attention to actions that affect real data or money. Use test accounts and payment sandboxes wherever possible, so testing doesn’t create real orders, messages or charges.
Step 8: Prepare and Submit the App
To publish publicly, you’ll need developer accounts for the stores you plan to use.
The Apple Developer Program currently costs $99 per membership year. Google Play charges a $25 one-time registration fee, although new personal accounts may also need to meet testing and identity-verification requirements before public distribution.
You’ll also need to prepare the store listing, including:
- App name
- Icon
- Description
- Screenshots
- Category
- Age rating
- Support information
- Privacy policy
- Information about the data the app collects
- Review instructions or demo login details, where relevant
Apple reviews apps against technical, design, privacy, safety and reliability requirements. Google also checks apps against its developer policies and distribution requirements.
Approval isn’t automatic. Reviewers may ask questions, request changes or reject the first submission. Leave room in the launch schedule for this back-and-forth.
Store requirements change regularly, so use the latest Apple submission guidance and Google Play documentation when preparing the final build.
The listing deserves more thought than a last-minute description and a few random screenshots. Our guide to App Store Optimization explains how to improve app-store visibility and turn more listing visitors into downloads.
Step 9: Launch and Promote the App
Publishing an app doesn’t guarantee that anyone will find it.
Start planning the launch before the app reaches the stores. Your strongest first audience will often be the people who already know your business or have shown interest in the problem.
Depending on the app, your launch plan could include:
- An announcement to your email list
- Promotion across your website
- Smart app banners for mobile visitors
- Social media posts
- SMS campaigns
- QR codes in stores or packaging
- Influencer or partner promotion
- Press outreach
- Paid acquisition campaigns
- An incentive for early users
- A referral program
Give people a clear reason to download. “We have an app now” isn’t much of a proposition on its own.
The reason might be faster access, a simpler experience, offline functionality, app-only content, early access to products, loyalty benefits or useful notifications. Lead with the benefit that matters to the user.
For a more detailed launch plan, see our step-by-step mobile app launch guide.
Step 10: Maintain and Improve the App
Launch is the beginning of the app’s useful life, not the end of the project.
After release, monitor:
- Installs and acquisition sources
- Account creation and activation
- Completion of the core user journey
- Retention
- Crashes and errors
- Ratings and reviews
- Support requests
- Revenue or other business outcomes
- Features that are heavily used or ignored
Use this information to decide what to fix and what to build next.
You’ll also need to keep the app compatible with new iOS and Android versions, store policies, security requirements, third-party services and changes elsewhere in your technology stack.
This ongoing work should be included in the original budget and ownership plan. If you hire someone to build the app, establish who will handle updates before the initial project ends.
How Much Does It Cost to Create an App?
The cost of creating an app can range from little more than your own time to hundreds of thousands of dollars.
The build method is one of the biggest factors:
| Build Route | Typical Cost Pattern | Typical Timeline |
|---|---|---|
| Code it yourself | Low initial cash cost, plus developer accounts, hosting and third-party services | Several months or longer, especially while learning |
| No-code or AI-assisted builder | Platform subscription plus any paid integrations, usage charges and publishing plans | Days or weeks for a prototype; longer for a reliable production app |
| Freelancer or small team | Project fee plus maintenance and infrastructure | Several weeks to several months |
| Development agency | Larger project fee covering strategy, design, development and testing | Usually several months |
| Managed website-to-app service | Setup fee and ongoing subscription | Usually faster because the existing website provides the foundation |
Complexity matters just as much as the route. Login, payments, live messaging, location, offline functionality, video, custom animations and unusual integrations can all add time and cost.
Ongoing expenses may include:
- Hosting and database usage
- App builder subscriptions
- Apple and Google developer accounts
- Analytics and monitoring tools
- Third-party APIs
- Payment processing
- Maintenance
- Security updates
- Customer support
- Marketing and user acquisition
A cheap first build can become expensive if it requires constant manual work or can’t support the next stage of the product. A more expensive route can also be wasteful if you haven’t validated the idea.
For a more detailed breakdown, read our guide to how much it costs to create an app.
Creating an App From an Existing Website
If your business already serves customers on the web, you’re much closer to launching an app than you might think.
Your website could already do 90% of what your app needs to do. That makes the project less about building a whole new platform, and more about converting your existing site into something that works as a standalone app.
There are a few different ways to do this, depending on how much you want to invest, how much of an “app” you want it to be, and how much you want to have to manage going forward.
Here are three ways to go about it.
Progressive Web App
A Progressive Web App, or PWA, adds app-like behavior to a website. Users access it through their browser and may be able to add it to their home screen.
PWAs can be relatively quick to launch and let you keep a single web codebase. However, installation is less familiar than downloading from an app store, and the experience, discoverability and device capabilities can differ from a conventional iOS or Android app.
Website-Based iOS and Android App
Another option is to use your live website as the foundation for your app, with a native layer on top of what you’ve already built.
The native app layer can add app-specific navigation, push notifications, deep links, saved sessions and other mobile functionality around the existing web experience.
This lets you continue managing content, backend operations and more through your website. Changes made to your website carry over to your app automatically, and you essentially have just one codebase to maintain - while shipping products on web, iOS and Android.
Separate Native Frontend Connected Through APIs
The third option is to create a completely separate app interface and connect it with your website’s backend through APIs.
These might be custom APIs built by your dev team, or your web platform’s existing APIs. What this does is it lets your website and app communicate with each other and share data - so, for instance, you can take orders in your app and have these orders register on your site.
Building custom apps with custom APIs gives you more freedom to create a distinct app experience. It can be the right choice when the app needs to behave very differently from your website.
But it also means developing and maintaining another frontend. Every important feature, integration and change needs to be supported in both places.
The extra flexibility only pays off when there’s a clear product reason for the app and website to be substantially different.
How MobiLoud Makes Building a Mobile App Easy
MobiLoud follows the website-based route, and gives you an efficient yet powerful way to convert your website into an app.
We specialize in helping established ecommerce brands launch custom mobile apps, powered by their existing website.
The website remains the main source of truth for both channels, while we build a native layer that lets your app provide a unique, native experience, and run on the customer’s phone.
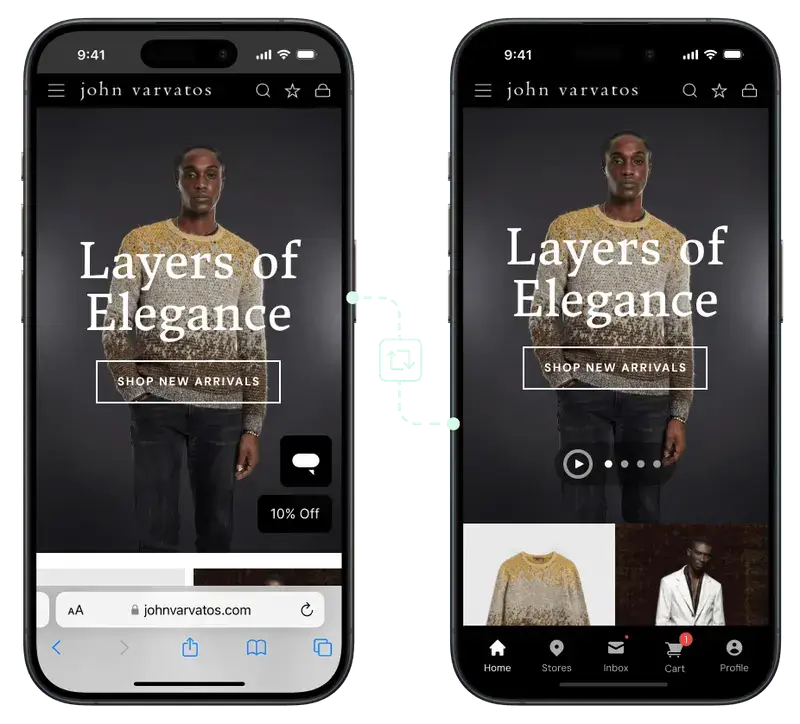
Because it’s built on your existing store, there’s a lot you don’t need to rebuild, including your:
- Website design and mobile experience
- Product catalog
- Checkout
- Customer accounts
- Subscriptions and loyalty programs
- Reviews
- Personalization
- Regional storefronts
- Existing ecommerce integrations
The MobiLoud team handles the app configuration, design, testing, app store assets, submission and ongoing platform maintenance.
This isn’t the right approach for every app; if you’re launching a mobile app from scratch, or you specifically want an app that lives on its own, you’ll want a more custom route.
But for any web-first business that’s already built the foundation for a great mobile app, MobiLoud is the best way to finish the job.
If you want to see what your site would look like as an app, and learn more about the process, get in touch and get a free preview of your app now.
Common App Development Mistakes
A few mistakes appear repeatedly across app projects. Most of them happen before the development team writes much code.
Building Before Validating the Problem
Excitement can make development feel like progress. But a finished app doesn’t solve the problem of weak demand.
Talk to users, test the proposition and look for evidence that the problem matters before committing to a large build.
Trying to Launch With Every Possible Feature
Each extra feature creates more design, development and testing work. It also gives users more to understand.
Build the smallest version that delivers the core outcome well. Use real behavior and feedback to decide what comes next.
Choosing the Tool Before Defining the Product
A tool may look impressive in a demo but still be a poor match for your requirements.
Define the users, journeys, integrations and constraints first. Then evaluate which development route supports them.
Ignoring the Cost of Maintenance
The initial build is only one part of the cost. Apps need bug fixes, compatibility updates, security work and continuing improvements.
Decide who owns this work and how it will be funded before launch.
Testing Only in a Preview or Simulator
Real devices expose problems that previews miss, including keyboard behavior, permissions, performance, screen sizes, notifications and unstable connections.
Test the complete app with realistic accounts and data before submitting it.
Assuming App Store Approval Is Automatic
Apple and Google can reject apps that don’t meet their policies or provide enough value.
Review the current guidelines early, particularly if the app relies heavily on web content, handles sensitive information or sells digital goods.
Rebuilding an Existing Business Without Considering the Duplication
If your products, accounts, checkout and integrations already work on your website, recreating them in another system creates long-term overhead.
There may still be a good reason to do it. Just make sure the benefit of a separate app experience justifies maintaining two product surfaces.
Final Thoughts
Creating an app starts with understanding the problem and the people you want to help. Once that’s clear, the rest of the process becomes a series of practical decisions.
Validate the idea, keep the first version focused and choose a development route that fits the product, budget and team. Then plan for testing, publishing, promotion and maintenance as part of the project, rather than treating them as problems to solve at the end.
If you’re creating a brand new product, that may mean coding it yourself, using an app builder or hiring a custom development team. While MobiLoud offers a far more efficient path to market for web-first businesses, such as ecommerce stores.
The good news: the mobile app market is booming. There’s never been a better time to launch a mobile app. The only question is how you’re going to do it.