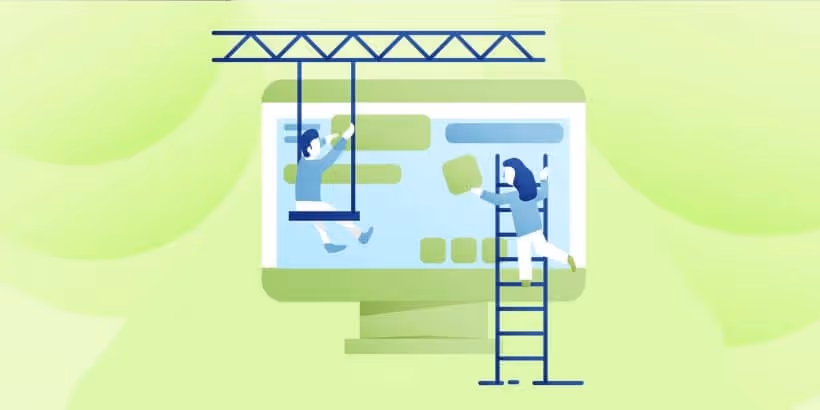
How to Build a Mobile App With Buddypress and Wordpress

If you own a BuddyPress website, you've probably seen in Google Analytics that much of your site traffic comes from mobile. Now, you know it's time to create a BuddyPress mobile app so your users can easily access your site wherever they are.
If you’re an experienced WordPress user, then you’ve probably come across its powerful social networking solution, BuddyPress.
WordPress makes it easy for non-techy website owners to set up a fully functional social networking platform in a few simple steps with the free BuddyPress plugin.
The developers behind it describe it as a social network in a box. It allows members to sign up, create profiles, connect with other members, and share status updates – just as they would on any other social network.
In addition, building a social networking site with BuddyPress is great for online business owners, niche communities, institutions, and other organizations who want to create their own social network for team members, customers, and friends to communicate and share content.
With BuddyPress, you get:
- A complete social networking solution that integrates seamlessly with WordPress.
- An intuitive and user-friendly interface that’s incredibly easy to use.
- An open-source platform that is extendable through add-ons.
- Your own social networking platform!
Read on to see why BuddyPress should power both your website and mobile app as well as how to get started.
The Benefits of Building a Social Network with BuddyPress
Building a social network with BuddyPress is easy. Installation is simple. Configuration is quick and intuitive. And, just like WordPress, it comes with all the functionality you’d ever want for your social network.
Building a Social Network Website with BuddyPress
Just because it’s easy to use, does that make BuddyPress the best solution for building your social network website? Here are just some of the things BuddyPress gives you the power to do:
- Register users and members.
- Share custom feeds with users based on their preferences.
- Send relevant notifications to users about activity in their feed and community.
And don’t forget about what it does for your users who can now:
- Create more robust user profiles for themselves.
- Manage their accounts.
- “Friend” one another.
- Participate in private chats.
- Post, comment, favorite/like, and tag others.
- Create and join sub-groups based on shared interests, locations, and so on.
In addition, because BuddyPress is open source software, it can be extended using a number of BuddyPress-compatible plugins.
ad
BuddyPress also works with any standard compliant WordPress theme.
So, if your website already exists and the social network is something you’re adding on, you don’t have to worry about ditching the old theme to find one that’s BuddyPress-friendly.
That said, there are a number of WordPress themes designed specifically for BuddyPress websites, so be sure to keep reading for a list of suggestions.
Ready to kickstart your BuddyPress website growth?
Discover 3 of the most essential BuddyPress plugins in our downloadable PDF!
The Advantages of Mobile Apps for BuddyPress
Once you have built a community site with BuddyPress, you now have the opportunity to build a community app for it.
comScore’s 2017 U.S. Mobile App Report showed that, in general, mobile apps (both smartphone and tablet) comprise 57% of all time spent with digital media.

When you look solely at how consumers spend time on their mobile devices, there’s no contest. 87% of time spent on mobile takes place within mobile apps.

Clearly, the convenience of mobile apps is far superior to relying on a mobile browser to access frequently used sites and services.
Smartphone users want an easy way to access their favorite content and services. Apps offer just that, with several added benefits for you, as the site owner.
A BuddyPress mobile app is going to provide advantages that help your users find, engage with, and stay using your community.
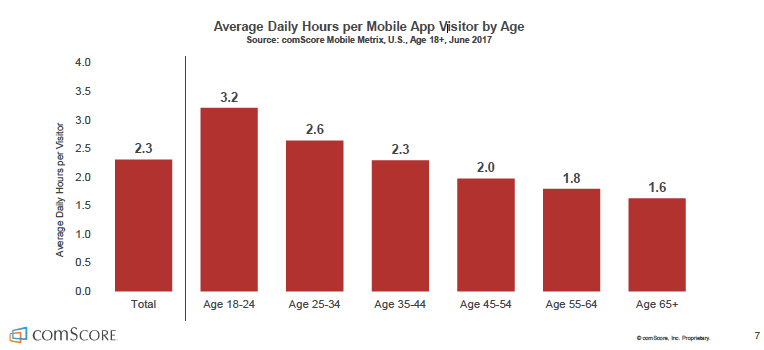
Capture more of your target audience. A Pew report from 2018 shows how quickly social media usage has grown across all age groups over the last ten years.
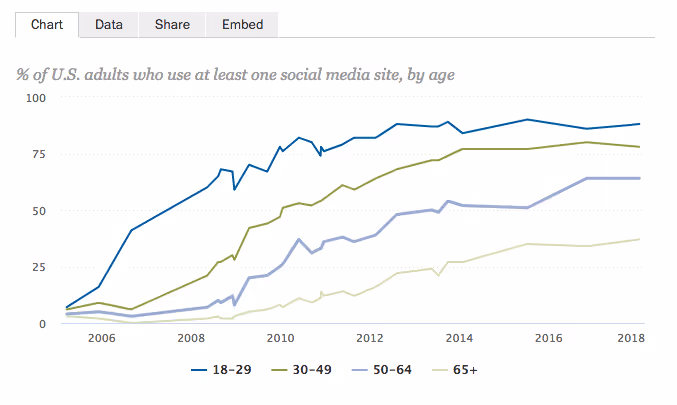
That said, it’s quite clear that it’s the younger users that gravitate more towards social networking. Further, it’s the younger generations that spend the most time in mobile apps.
BuddyPress apps give you a chance to capture more of your target audience, and engage your users more than you could on the mobile web.
Familiarity. The experience of walking through a website can sometimes be a surprise. With mobile apps, however, there is a formula to designing a user experience that works. It’s this level of familiarity that makes users instantly more comfortable in this environment.
Greater productivity. For social networks developed for professional purposes, you’re giving businesses a chance to be more productive within their own operations. As productivity and profits rise, word will spread.
A direct communication channel. Push notifications allow you to establish direct interaction with your site’s users, alerting them to new content, events and anything happening on the site.
A constant reminder of your community. Beyond push notifications, having your app’s icon on your user’s home screen is the best way you can remind users to log into your site.
A presence on the app stores. People are increasingly relying on app stores to discover new services and social apps. Your presence there means you have a chance to be found where people are actually searching.
Simplified login. Many apps now make use of social media login functionality (usually through Facebook, Twitter, or Google) for easier and quicker access inside.
Native social sharing. Your app can rely on the user’s installed apps for social sharing, which means it’s now easier and faster for them to share your content.
Native advertising. Mobile apps can integrate native Mobile Advertising solutions like Admob, Google Ad Manager, Mopub and others. As a site and app publisher, this means you can integrate your monetization strategy with an app-specific solution which is effectively immune to ad blockers (there are also other ways to monetize - check out our Complete Guide to Mobile App Monetization here).
Offline access. Building a community app to supplement your site gives the end user direct access to it from their device and can make it available offline (provided the functionality is supported by your site).
It’s another learning opportunity. Every digital channel through which you engage with your audience is a learning experience--and one which you can profit from. Learn what really gets your community excited, so you can continually build a better social network.
Of course, a mobile app is only one piece of the puzzle. So, let’s walk through how to get you started with a BuddyPress website and then look at the work involved in creating your BuddyPress mobile app.
Get Started with a BuddyPress Website

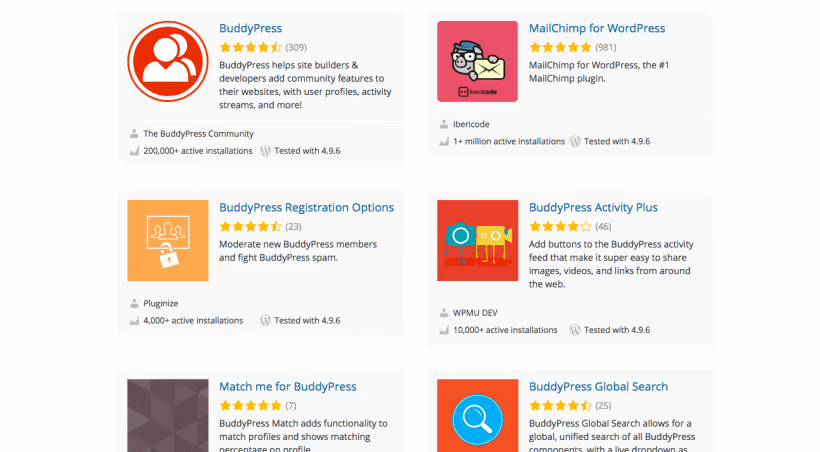
To get started with a BuddyPress website, you first need to install the BuddyPress plugin from the WordPress repository.
Within WordPress, navigate to your Plugins menu. Click on Add New and search for BuddyPress:
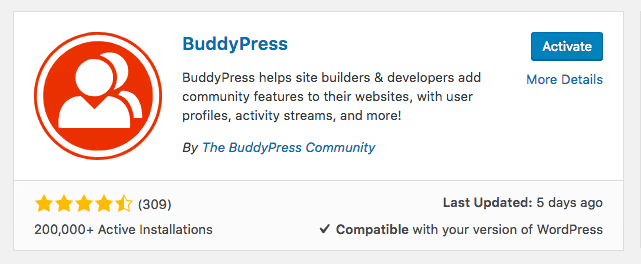
Install and activate the BuddyPress plugin once you’ve located it.
Because every BuddyPress social network site is going to be different, it’s important to spend some time configuring it so that it matches your exact needs.
Configure BuddyPress Settings: Components
You can find settings for your BuddyPress plugin under the Settings > BuddyPress menu.
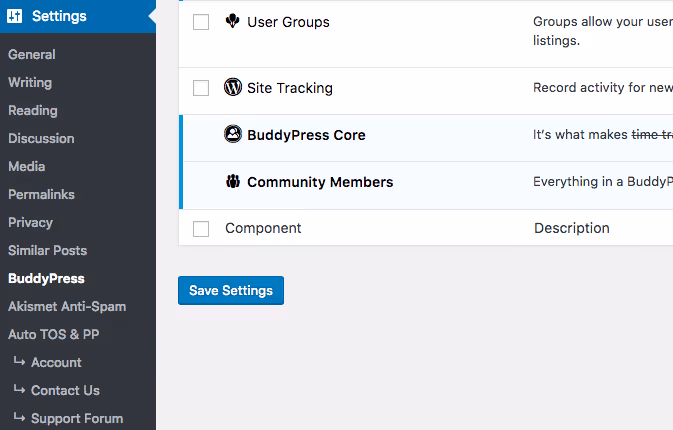
The first tab for configuration is called Components.
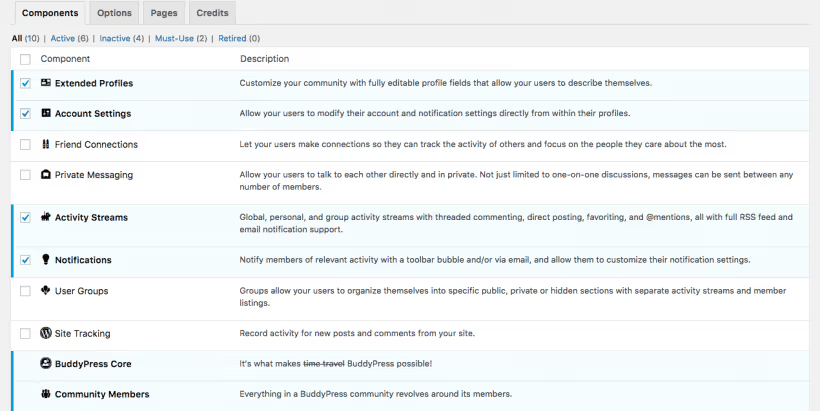
This is where you’ll determine what sort of features you want to make available to users. These include:
- Extended Profiles
- Account Settings
- Friend Connections
- Private Messaging
- Activity Streams
- Notifications
- User Groups
- Site Tracking
To change the default configurations, simply check the features you want or uncheck the ones you don’t. Then click the “Save Settings” button at the bottom of the page.
Note that upon activating some of these components, new menus will now appear in the WordPress dashboard for you.
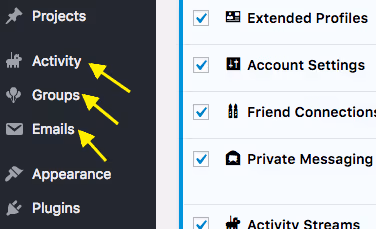
Activity lets you know what “authors” have done on the site in terms of registering accounts, updating profiles, friending other users, and so on.
Groups allows you to create new sub-groups that users can join--including configuring unique settings for each, adding a logo, and adding users. You can also check on the status of all your BuddyPress groups from this menu and stay on top of which ones are most active, have the most members, etc.
Emails is where you customize and create new automated messaging based on your social network’s activity.
Under the Users menu, you’ll find three new settings as well:
Manage Signups: You can register and approve new users. However, in order to activate this module, you need to visit the Settings > General menu.
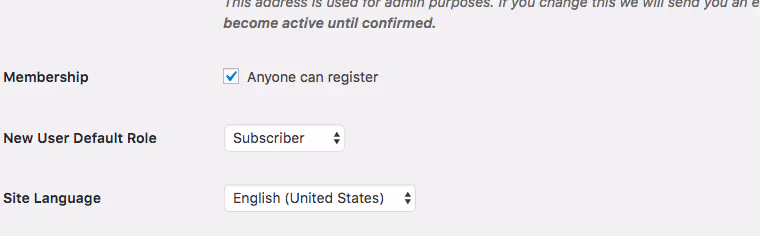
Click on “Anyone can register” to enable this component.
Profile Fields: Use this to customize which fields are available to your newly registered users when they create and update their profiles.
Site Notices: If you want to issue a welcome message or notice to users once they’ve logged into your website, create it here.
Configure BuddyPress Settings: Options
Return to the BuddyPress Settings menu. Click on the Options tab.

From this tab, you will determine how much flexibility and control users have over their accounts and profiles. This is broken down into four categories:
- Main Settings: deals with interface options as well as the ability to delete accounts
- Profile Settings: mostly pertains to personalization of profiles with images
- Groups Settings: allows users to create their own groups and personalize them with images
- Activity Settings: check this if you want to allow for user engagements within activity streams
Save your settings when you’re done.
Configure BuddyPress Settings: Pages
Finally, let’s talk about what pages you’ll need for your BuddyPress social network.
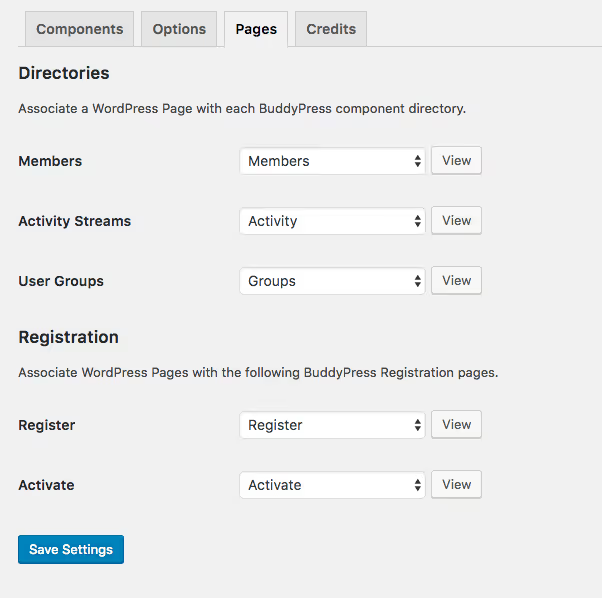
From this tab, you will need to assign designated pages for your social network. There’s no need to use all of these if you don’t need them. If that’s the case, just select “None” for that page and save your changes.
Also, note that BuddyPress automatically creates these pages for you:
- Members
- Activity Streams
- User Groups
- Registration
- Activation
You can create custom ones, too. Just remember to link them through this page.
Last, but not least, you have to add these pages to your WordPress site’s navigation (that part BuddyPress won’t take care of for you).
To do this, go to Appearance > Menus. Find the new social network pages you want to add, click the checkbox next to each, and select “Add to Menu”. You’ll then see them drop into the navigation menu structure on the right.
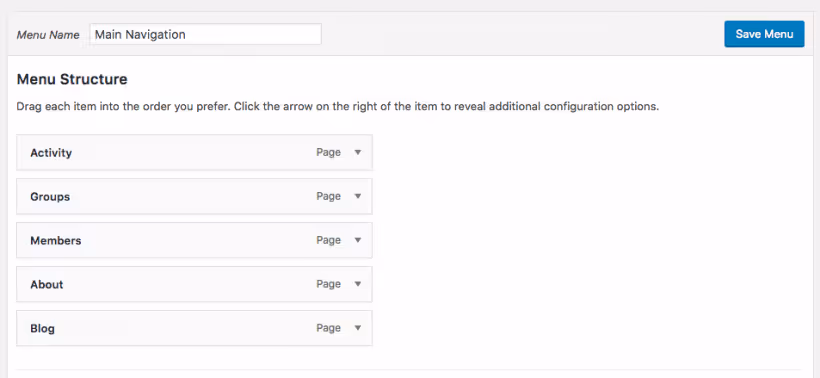
Organize these however you see fit and then click “Save Menu” when you’re done.
Pick a Relevant Theme
BuddyPress lets users launch a social networking site in minutes and with a simple setup. Once you’re done with the initial setup, you’ll need a theme for your site. As I mentioned earlier, BuddyPress is compatible with all compliant WordPress themes. However, if you want one that will make designing a social network site easier to handle, as well as the later conversion of it into a mobile app, you need a mobile-optimized theme.
We’ve picked out some of the best BuddyPress themes to help you kick things off, with special attention to their mobile features and design.
BuddyApp
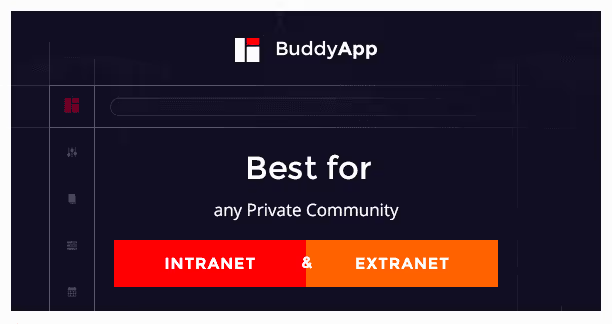
BuddyApp markets itself as a mobile-first community theme. This one-of-a-kind theme features a mobile-optimized design and is ideal for managing and engaging with any private community – Intranet or Extranet. BuddyApp’s blazingly fast AJAX-based search, live chat, and live notifications enhance user experience and make it an ideal choice for your community’s mobile app.
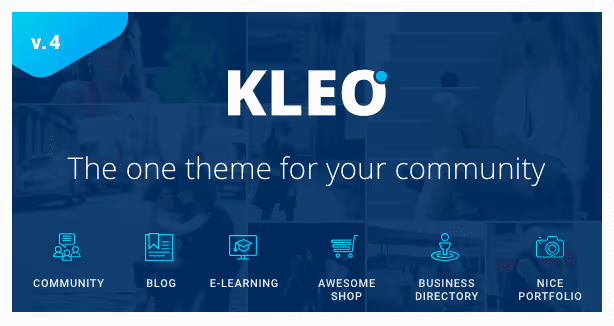
KLEO is a multipurpose BuddyPress theme that’s designed to take your social networking site to the next level. And with its multipurpose templates and demo importer, it’s incredibly easy to design your mobile social network website with the features your community’s members want. As a bonus, the KLEO theme comes with the Visual Composer drag-and-drop page builder for easy customization.
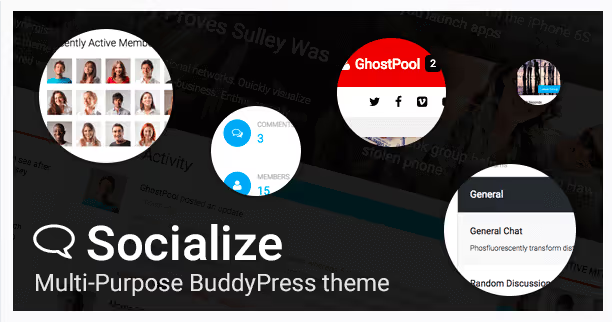
Socialize is another great example of a multipurpose WordPress theme built specifically for BuddyPress. In addition, Socialize integrates with bbPress for when you want to add a community forum to your social network. Among the user-friendly features included in this theme, the one to get most excited about is the inclusion of BuddyPress widgets in Visual Composer.

When designing intranet and extranet communities for local government, academia, and other local-serving organizations, your focus should be less on offering fun favorite/comment/friending capabilities. This needs to be a highly functional and collaborative network. Woffice successfully answers the call in helping designers create a private community while also focusing on the mobile-friendliness of it by employing a design inspired by Material Design.
In general, using a BuddyPress-compatible WordPress theme will speed up the time-to-market for your new social network website. However, don’t forget to take time to develop personal branding for it as well. This includes deciding on a unique and memorable brand name for your community, designing a custom logo to match it, and choosing a color scheme that properly reflects the tone and personality of the network.
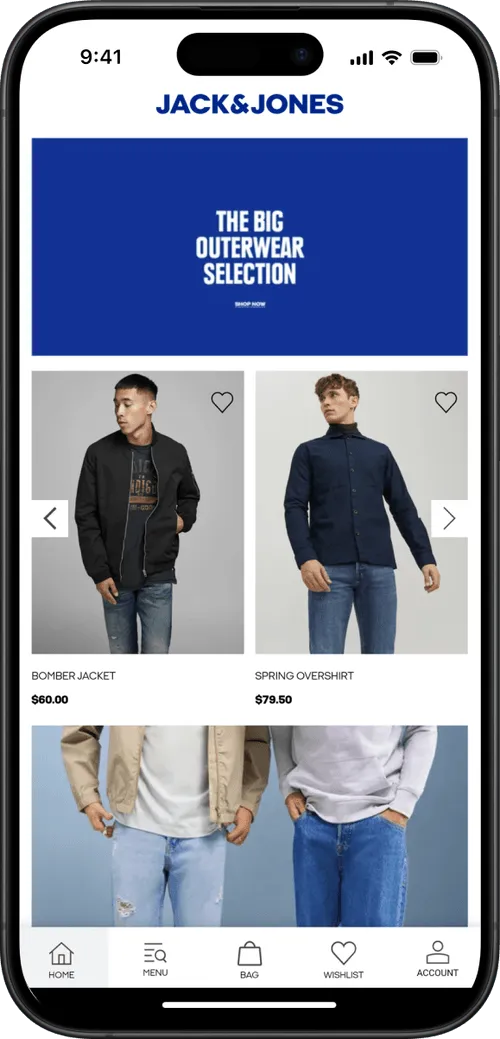
Building your Mobile App with MobiLoud
With your BuddyPress website built, you can now focus on converting that website into a mobile app for your community members to use and engage with. There are a few options website owners and web developers have in terms of how to do this.
- Code the mobile app from-scratch, using your WordPress site as inspiration.
- Hire an app developer to build it on your behalf, which can be expensive as well as a lengthy process.
- Quickly create a hybrid mobile app, whereby you insert your mobile website into an app (likely to lead to app store rejection).
- Convert your website into a BuddyPress native app using trusted software and mobile app experts.
The last option is the ideal choice. It’s cost-effective, quick, and produces the highest quality results--especially when you use the MobiLoud app.

What Is MobiLoud?
MobiLoud allows site owners to extend their site’s online-only presence with a native mobile app for both the iOS and Android platforms.
With this complete service, you can set up a fully functional mobile app with your existing BuddyPress theme. This ensures that you don’t lose the design customizations and branding you’ve worked so hard to build when creating a mobile app for your website.
The team behind MobiLoud will take care of configuring, building and publishing your mobile app for you. Once you sign up with the service, there’s practically no work for you to do to get your app published on the Google Play Store or the Apple App Store. Oh, and don’t forget about the dedicated support and automated updates you receive. It really is an all-in-one mobile app solution.
MobiLoud works by adding a native layer to your mobile website that includes:
- A customizable native launch screen which lets your mobile web app load in the background as the app starts.
- Page preloading, so the main pages of your site are immediately available when your app starts.
- Native tab bar for instant navigation between the main pages of your app.
- Push notifications inbox to get back to all the messages you sent, which also happens to integrate with OneSignal and Firebase.
- Advanced control panel for push notifications, so users are in control of what they receive.
- Support for user logins, which are integrated with push notifications.
- Support for geo-location to allow any location-based functionality in your web app.
Here are some more reasons why MobiLoud is the optimal choice over the competition:
- It integrates with the WordPress login, which is great for your users.
- It integrates with BuddyPress, so you don’t have to worry about losing any of the functionality from your website when you convert to an app.
- It’s also not some bloated app (like PhoneGap) which forces you to miss out on crucial elements from BuddyPress.
By offering the best features for your mobile website and mobile app, MobiLoud gives your social network a strong presence in the iOS and Android app stores, quick navigation UI elements, content caching, native mobile advertising options, animations, and front-and-center screen real estate on your viewer’s mobile device.
How to Easily Convert BuddyPress into a Mobile App with MobiLoud
Want to see how easy it is to easily convert your BuddyPress community into a mobile app? Follow these steps:
1. Optimize Your Site for Mobile
First you’ll need to ensure your WordPress website is optimized and responsive for mobile devices.
Your apps are essentially going to show your website as it would appear in mobile web browsers, with just a few added elements, and the browser tabs removed. So if you don't have a responsive website that looks and works well for smartphone users, do that now.
Most site owners will be able to skip this step, because it’s likely something you’ve already done. Mobile optimization today is not a “nice to have”, it’s a "must-have".
If you're not happy with the mobile version of your site, fix this before moving on to creating your app.
2. Get a Free Consultation
To start the process, get on a call with one of our project managers.
This call will help us understand your goals and any unique needs or desires you have from your app, and help you understand the process, and ensure you're comfortable that MobiLoud is the right option for you.
3. Choose Your Plan
Choose the right MobiLoud subscription plan for your needs. Starting at $399/mo (plus a one-time setup fee), plans are flexible enough to suit businesses of many different sizes.
Subscriptions require no long-term commitments, and all come with a 60 day money-back guarantee, making the decision to build an app completely risk-free.
Your subscription enables you to receive full support, including updates and maintenance for your app after launch, at a fraction of what it would cost to keep mobile app developers on staff.
4. Hand Off to Our Team
Now you can hand off the project to our team to do all the heavy lifting.
We'll code the backend of your apps, along with all the minor touches and tweaks that make your mobile apps look and feel 100% native.
This includes a native tab menu and navigation and mobile UI elements such as progress indicators, back button behavior, loading animations and spinners.
We also enable push notifications in your app. Push is a powerful communication channel to use to reach out to your app users, boost engagement, and get people opening your app more often.
You can, of course, change how your push notifications work later. You can also send unlimited push notifications from your WordPress dashboard once your app is live, as well as setting up personalized workflows with our push notification partner, OneSignal.
5. Test the Initial Version of Your App
In approximately two weeks, your apps should be ready for testing.
Download the app onto your own devices, and play around to see how they look, act and feel. If you have any change requests or things you want to add, you can do so at this point before sending your apps out for the world to see.
6. Finish Up and Launch
Finally, it’s time to publish your apps, and make them available in the app stores. All in all, steps one to seven might take less than a month, which is significantly faster than if you were to build an app from scratch.
We also take care of the notoriously difficult process of submitting your apps to the Apple App Store and Google Play, ensuring your app store listings get approved with a minimum of fuss.
7. Measure and Improve
Once your apps are live and you start getting downloads, keep track of a few relevant metrics (i.e. usage rate, engagement, revenue), and gather user feedback on your apps.
This will help you continue to add to and improve your apps over time - which is another area that the MobiLoud team will be on hand to help you with.
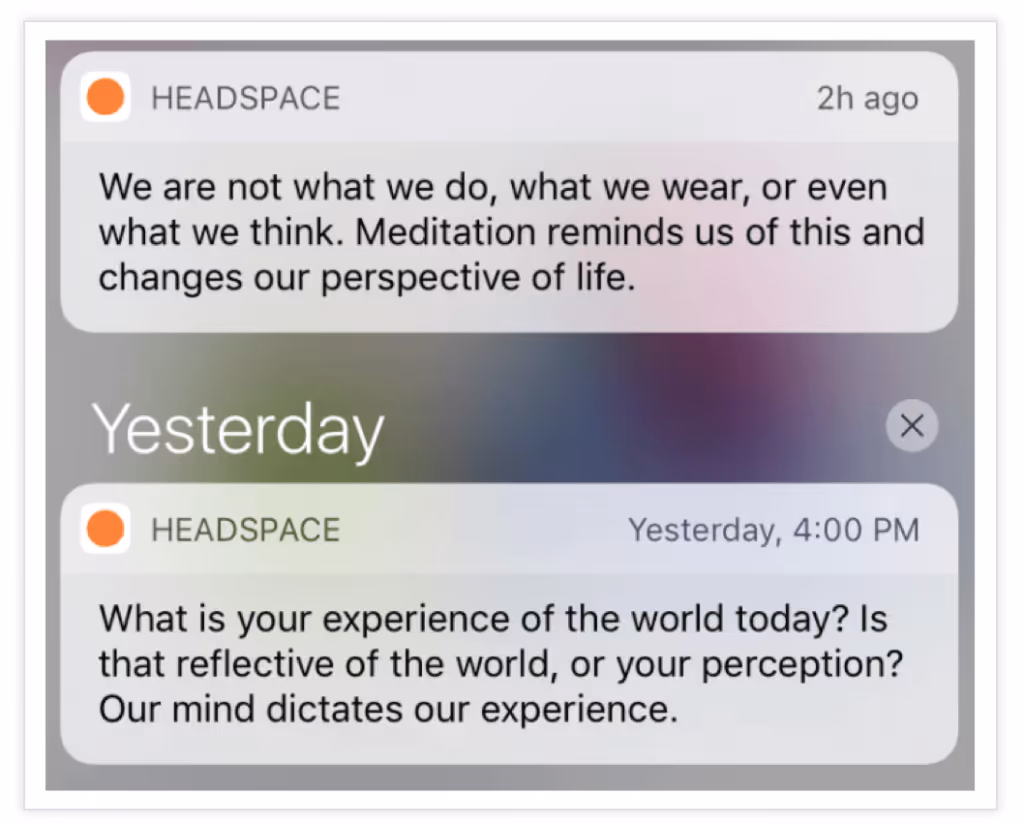
Engaging Users with Push Notifications
With a traditional WordPress website, you have to find ways to appeal to visitors to share their contact information. Then, when they're off your website you'll need to engage them with email marketing.
Without their willingness to fill out a contact form and hand over their email addresses, it’s very difficult to stay in touch with these prospects, customers, or members.
However, when you build an experience within a mobile app, you have the express advantage of already having a direct means to contact users. With your social network located on their mobile device, you can use push notifications that go directly to them on their mobile devices.
You can use push notifications to:
- Let users know when activity in the BuddyPress network happens.
- Send links to new content.
- Remind users about forum posts they haven’t seen.
- Notify them of private messages.
- Ask for app store ratings.
- And more.
Consequently, push notifications are beneficial to your brand as they:
- Keep users in your app longer.
- Increase popularity for your app because of how useful and engaging it is.
- Because it encourages repeated use and increased traffic, you get to learn more about your users so you can build better experiences.
Really, push notifications aren’t that much different from text messages. Your alerts appear on their screen--so long as they’ve enabled them--so that you may share quick snippets about what’s happening within the app. This, in turn, compels them to revisit the app again. It also keeps your app top-of-mind with users as they receive regular and relevant updates from you. It’s a win-win situation.
Wrapping Up
BuddyPress is a robust, feature-rich solution for building communities and social networking platforms which can be used for anything from helping your local sports team get-together, to allowing a massive network of employees located across the globe collaborate on a project.
Supplementing your community’s online presence with a native mobile app will give users a new, yet familiar way to connect with friends, family, and colleagues, thanks to app-only features like a presence on their device’s home screen, push notifications, and instant access to the main sections of your site.
MobiLoud has app builders for all the major WordPress plugins - like WooCommerce, LearnDash, PeepSo and many more. MobiLoud is ideal for BuddyPress though!
If you haven’t already, get started with a free preview of your app or, book a free consultation to see how well MobiLoud performs with your BuddyPress-enabled social network! Then, when you’re ready, get started with MobiLoud.
FAQs
Convert your website into a mobile app