The sections menu provides you with an easy way to display a more complex link structure, with multiple levels and different opening options.
Below you can find more details on how to configure the sections menu for your app:
1 - In your WordPress Dashboard, go to “Appearance > Menus” and click “create a new menu”.

2 - You can now drag and drop the different types of links into the newly created menu
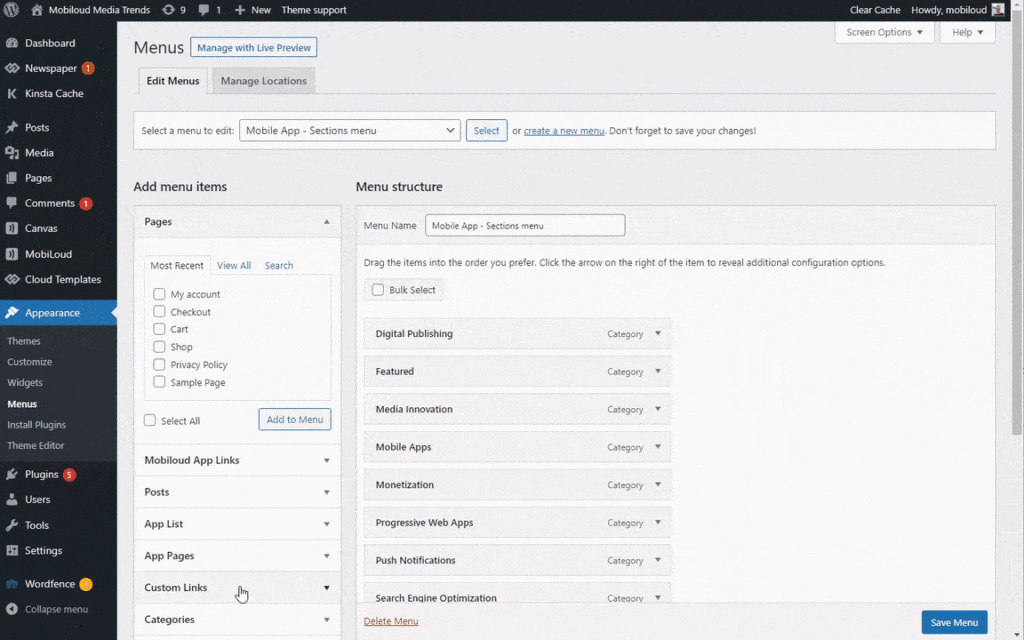
3 - Once you have organized the menu according to your requirements make sure to save it
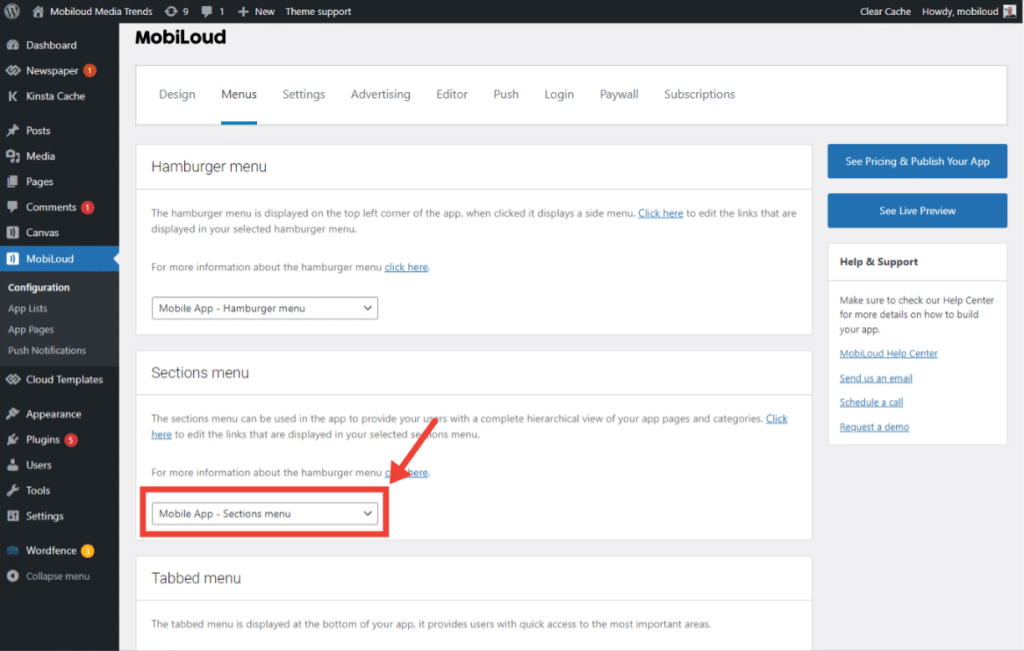
4 - Now go to “MobiLoud > Configuration” and access the “Menu” area

5 - You can now assign your newly created menu to the "Sections Menu" as you can see below:
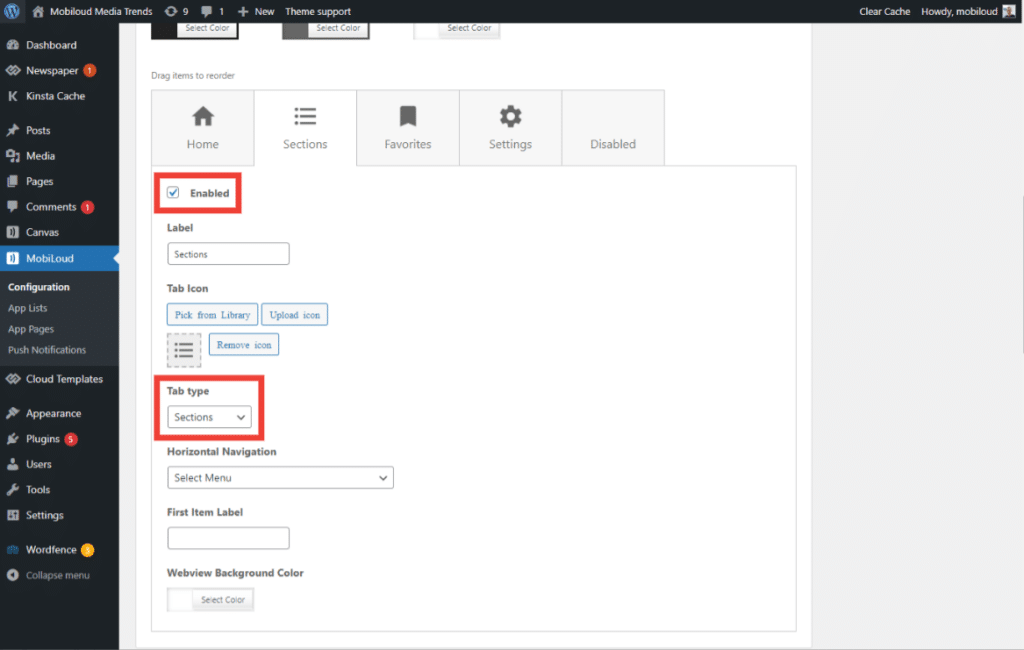
6 - With your "Sections Menu" created and configured you can now add it as a tab to the app, as you can see here: